
We are Marc, Heidi & Evi (MHE), a family that loves to go on outdoor adventures in our free time and on holidays. We are designing and converting our own DIY campervan for our nature roadtrips, mountainbike rides and hikes.
We've based our DIY camper design on numerous sources from all over the internet. We spent 7 months designing our van to our needs and wants. We used Sketchup for the 3D design and Excel for making the schematics.
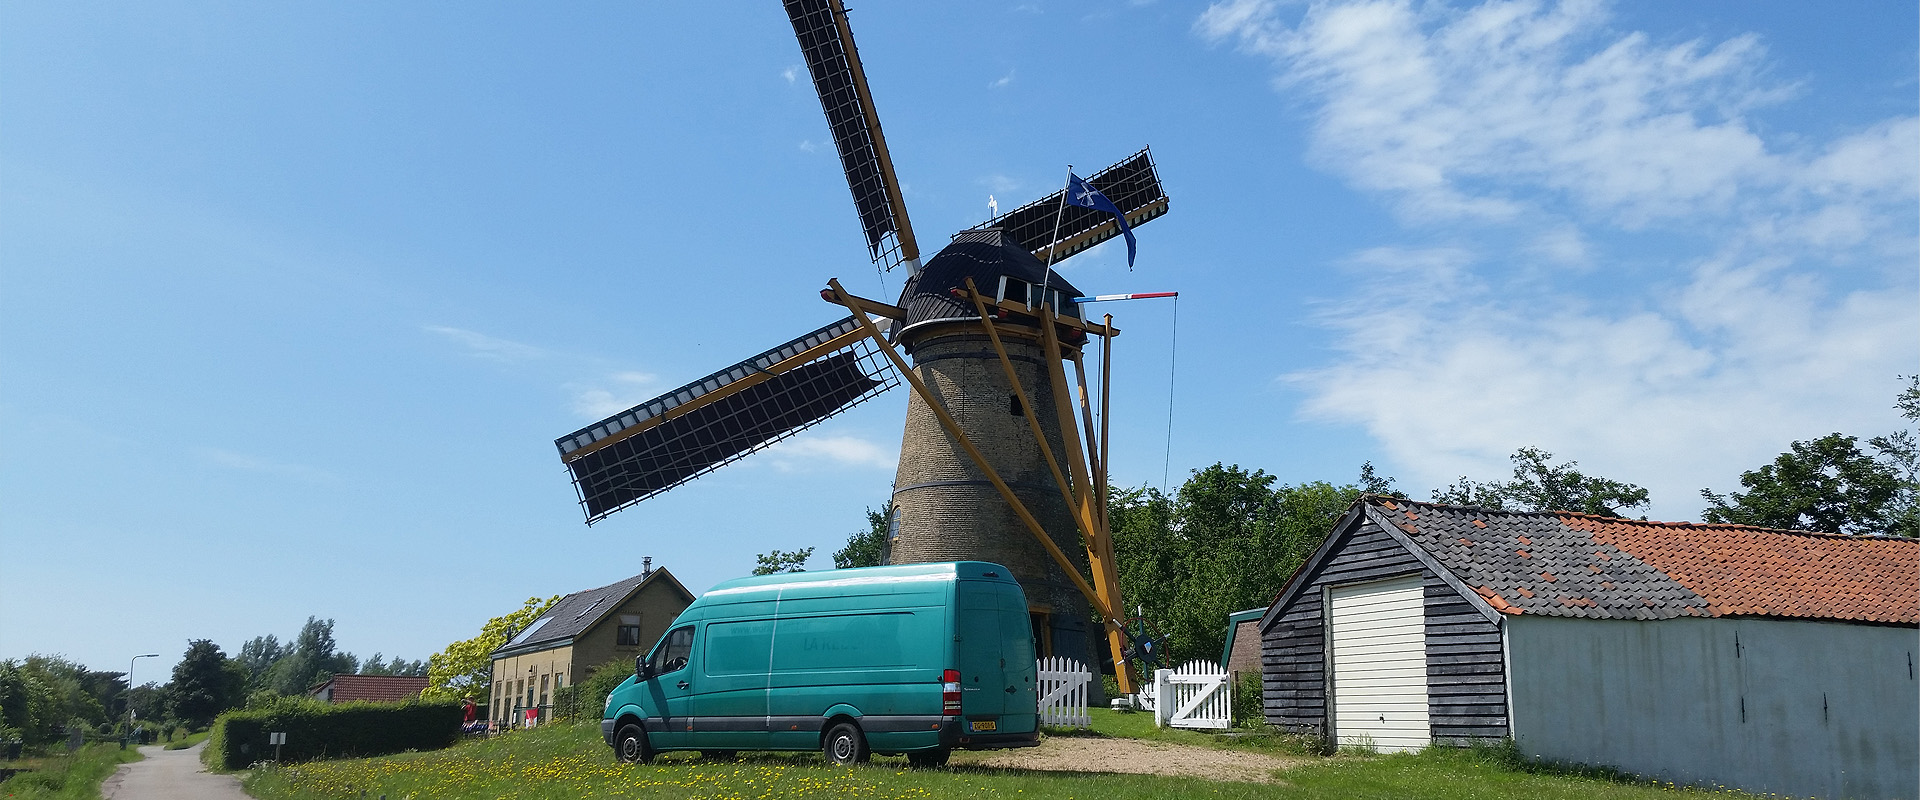
After many months of searching we bought our Mercedes-Benz Sprinter van and started the conversion. We've documented most of the building proces on this website. Also check out our video's on 3fDesign's YouTube Channel.
Some of our travels & adventures with our campervan we'll publish. We've been visiting England and Scotland for years and travelled the country extensively by car. We'll be back with our campervan!
As we are converting our campervan we are making our wishlist of places to visit and things to be experienced. Norway, Ireland, Switzerland, Italy, Spain, Portugal & Romania just to name a few.
Designing & building special experiences is also my dayjob. As an imagineer I was the lead designer the miniature worlds of tourist attraction Miniworld Rotterdam. Check out www.miniworldrotterdam.com.
Welcome to our exciting experience of converting our Mercedes Benz Sprinter into a functional, comfortable, cozy & awesome campervan. There is no right way to convert a van to a camper, so we just used our way!
Also check out our video on the Sketchup and Electrica Design of our van.
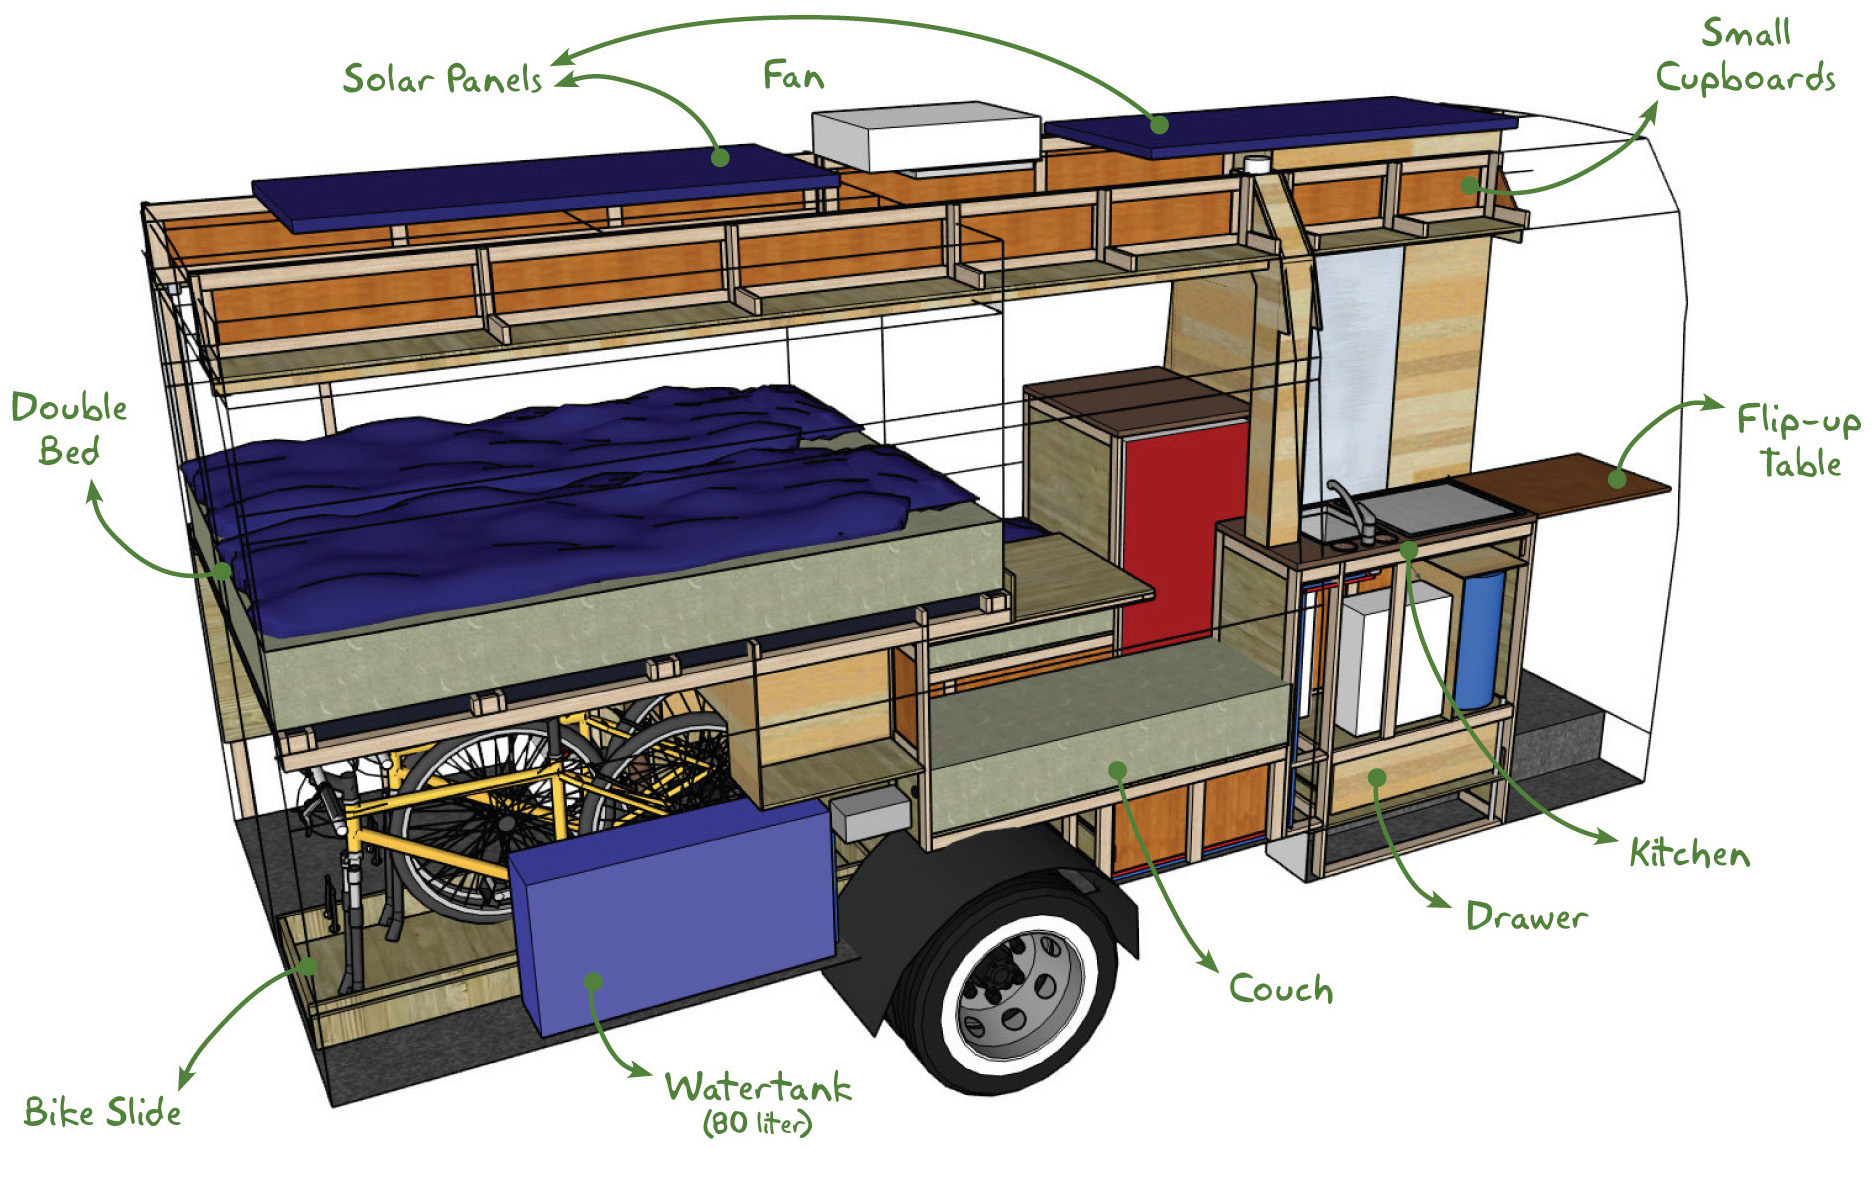
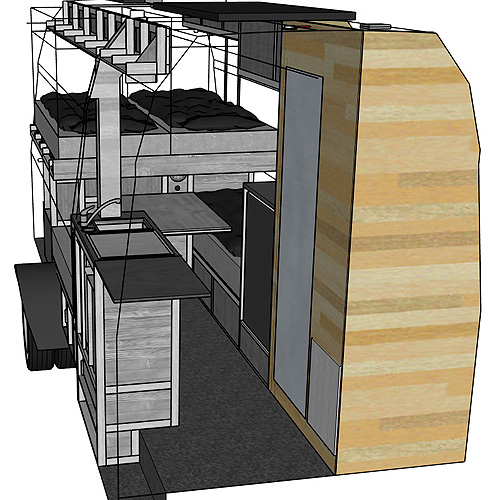
We love to travel and sleep in a different place every night. We want to optimize our time spent outdoors. Therefore having three fixed beds was one of the main requirement in our design. Also we really wanted to be able to stand upright.
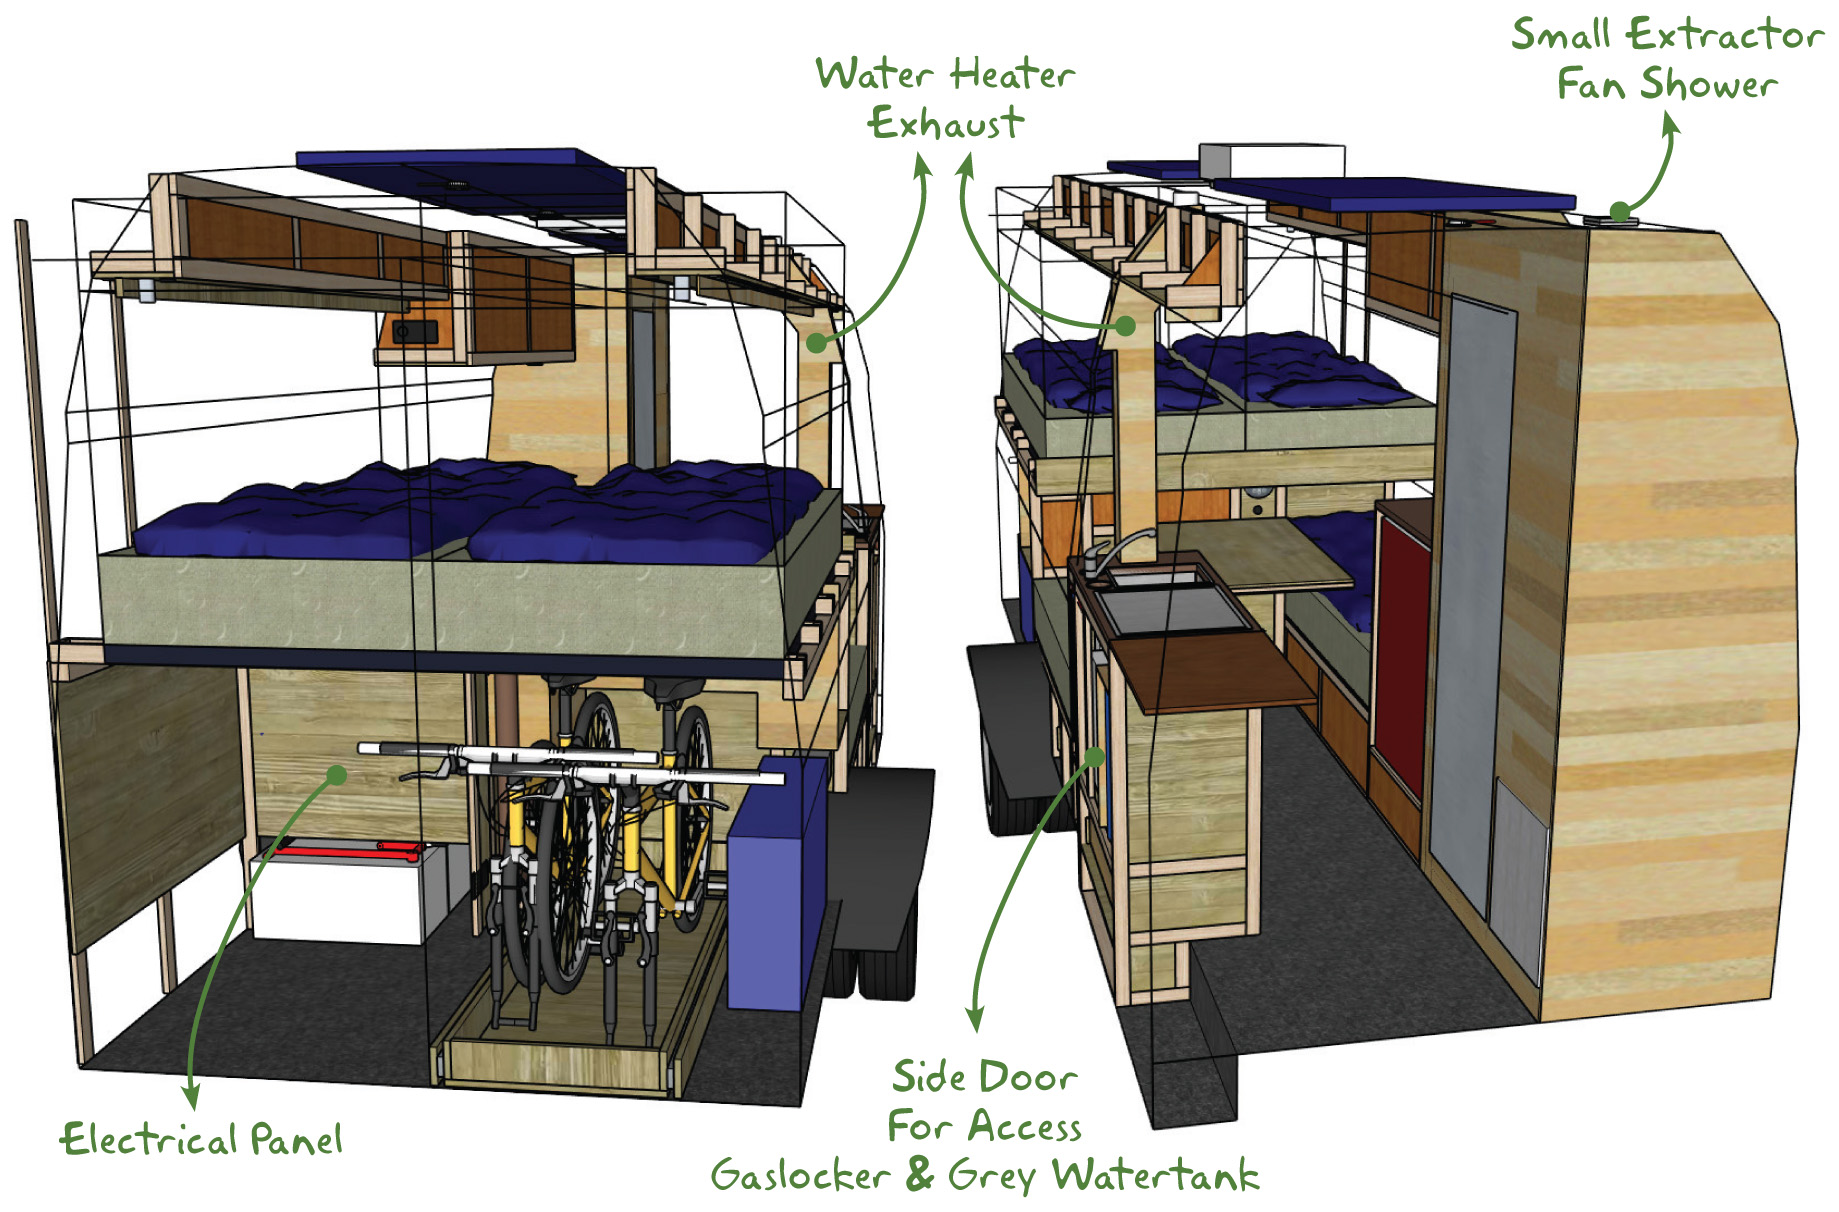
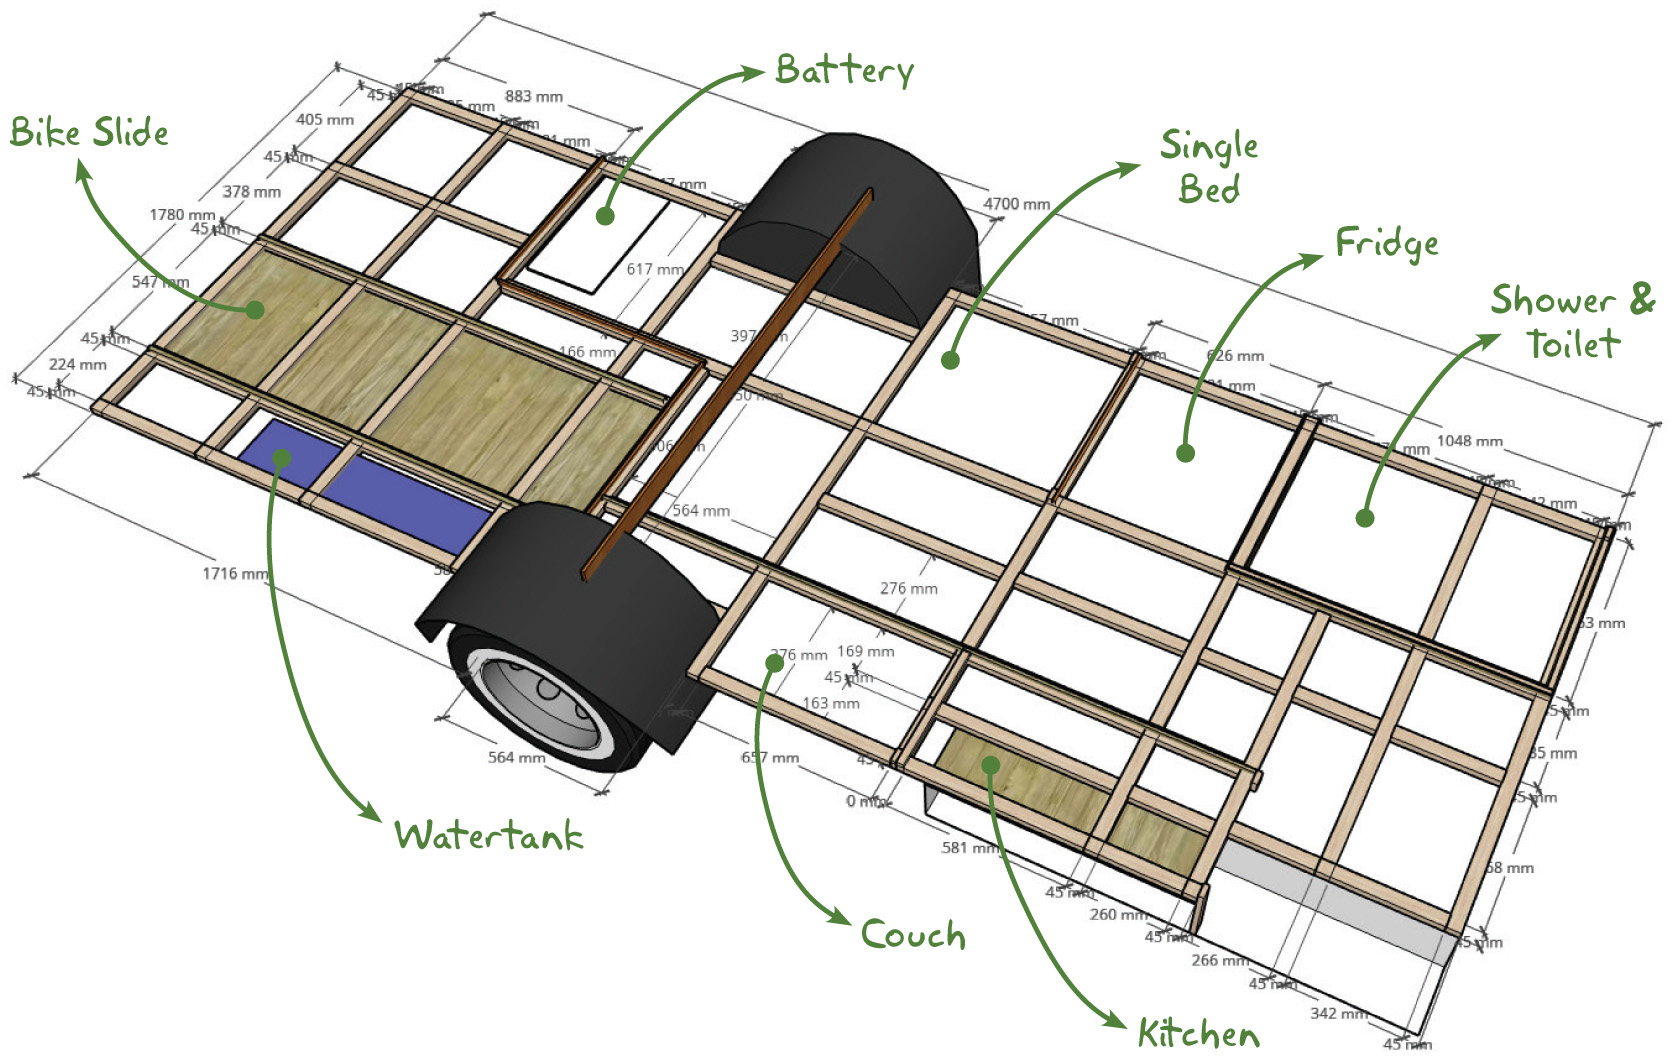
To be as stealthy as possible, we want to minimize external clues our van is actually a campervan. Less hassle parking and it's safer. So no visible hookups, service doors and hatches. Also an internal bike storage with slide that carries 3 bikes, situated in the garage under the double bed. The only visible clues are the two solar panels (150W each) and the fan on the roof.
Being able to park in cities is not our main concern, as we usually do our best to avoid them on our travels.
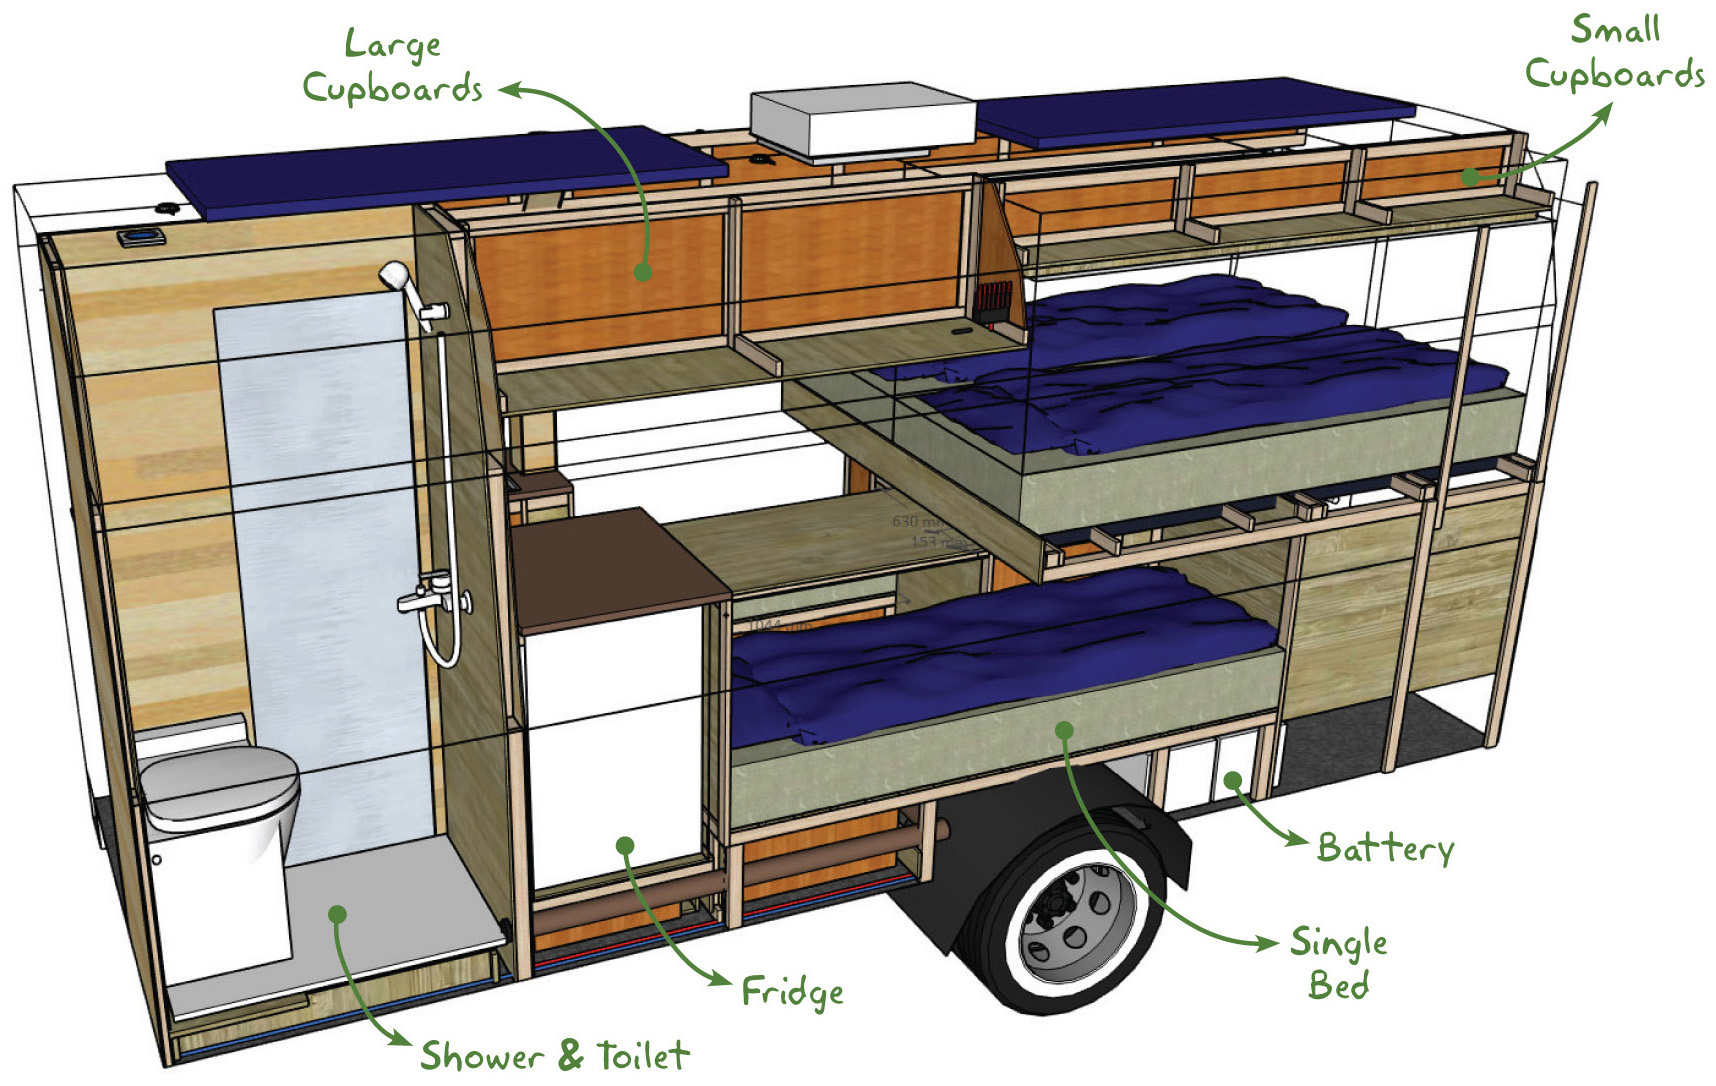
For wet and muddy outdoor adventures and wild camping a built-in shower and toilet are included. Unfortunately we were unable to fit in a jacuzzi.
For storage we use the space under the bench and single bed. Plus we built some overhead cupboards. Plus above the front seats we have an extra storage space.
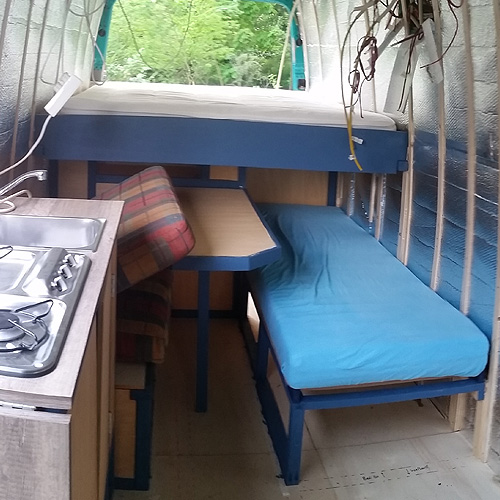
The living space includes a small kitchen, a top-loading fridge (59L) and small seating area with table.
We want to use the double bed as a living space as well. To be able to sit comfortably we needed a high roof, since the bed is about 1 meter above the floor to be able to fit in the bikes and our daughter's single bed.
We want to be able to wildcamp for at least 48 hours in clouded conditions. As fixed loads we have a fridge, fan, waterpump, lights (LED), smartscreen, 3 USB chargers and 3 outlets for 230V. We need to charge phones, laptop, tablet and camera's.
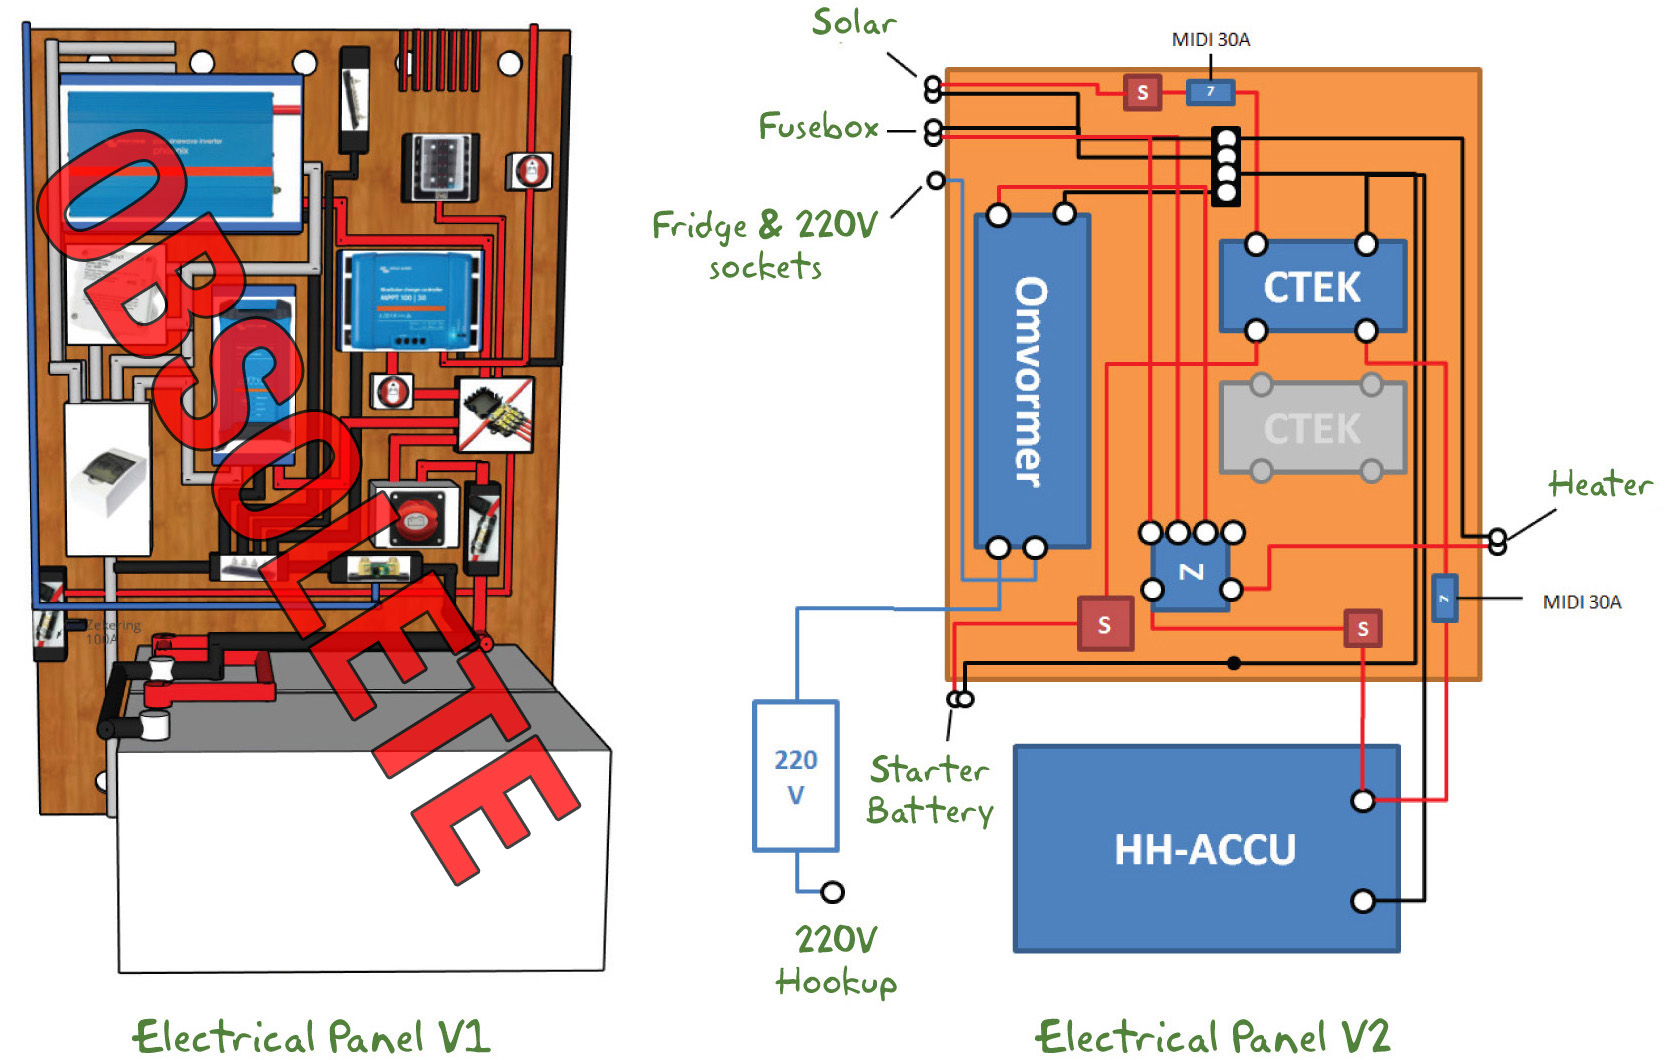
As an initial setup we choose a 250 Ah battery to be charged from solar, alternator and shore power. We designed the electrical system so it can be upgraded if needed. This requirement actually determined the component choices heavily.
For hot water we have a propane water-heater in combination with a 85L clean watertank and an automatic pressure water pump. With 2,4 bars of pressure we use regular taps.
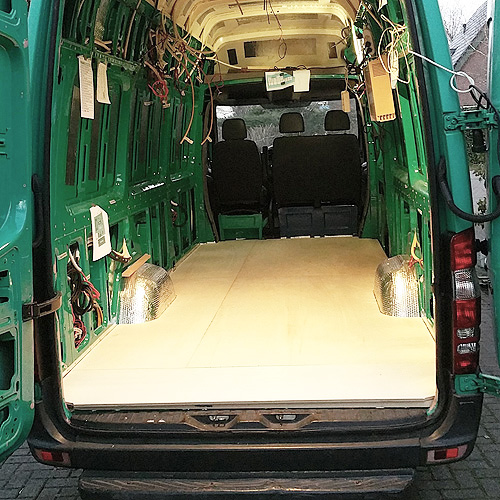
To fit in all features and wishes we needed an extended long wheel base and super high roof cargo van.
We eventually bought a used 2007 Mercedes-Benz Sprinter L4H3 for a very low price and a lot of fixing up to do.
Dimensions of the cargo bay are height 470 cm, width 176 cm and height 214 cm. Just enough to fit everything in.
We designed a floorplan in which the beams are precisely planned to serve as a base to fix all internal structures to.
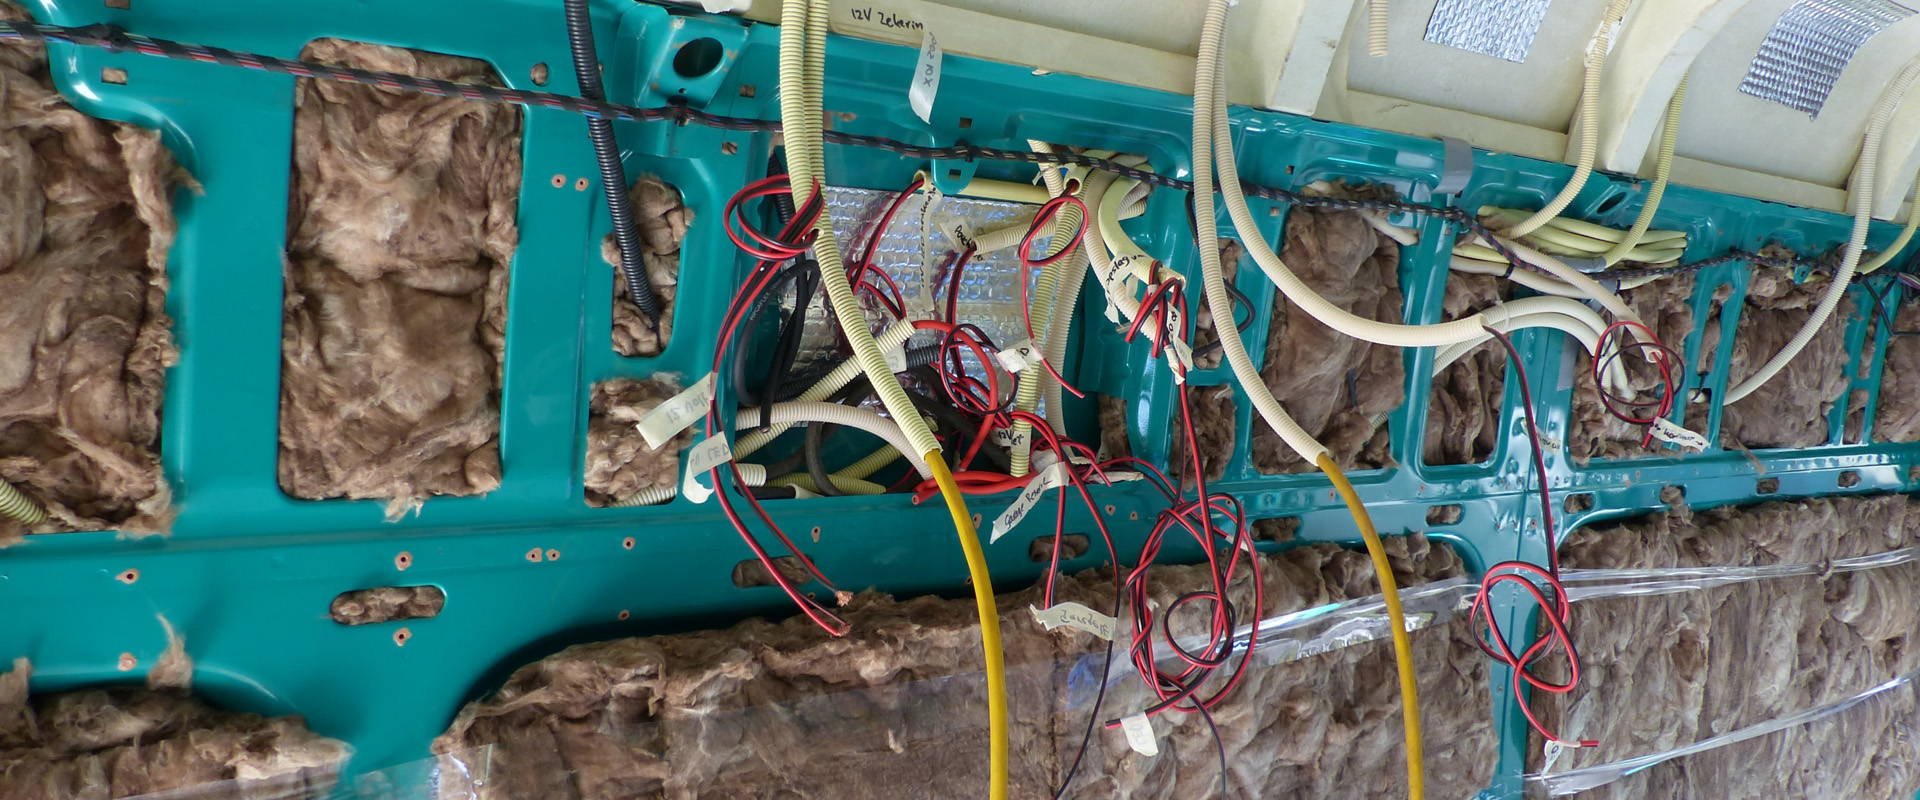
Because we will be travelling to warm and cold/freezing destinations we need good insulation. Our floor will be insulated with foam board. The walls and ceiling will be insulated using glass wool.
We have a 300W solar setup on the roof and a 250Ah AGM battery. The fan, fridge, lights, waterpump and USB chargers are powered by the 12V part of the system.
We have a 1000W 12v/230V pure sine inverter, with built-in automatic transfer switch and 12A battery charger for when are on a hookup. This powers our flatscreen and three outlets for running a small smartscreen, charging laptops and camera's. Also we have a 230V outlet in the "garage" for charging or using (small) powertools.
Our initial design had a 2 x 220Ah battery bank setup with 2000W inverter. A probably oversized and certainly expensive setup. To be able to start with a smaller system and be able to upgrade if needed, changed our whole design.


Remove side panels and bulkhead, rust removal, side trim sealing, placing a double seat, sound proofing and installing a window in the sliding door.
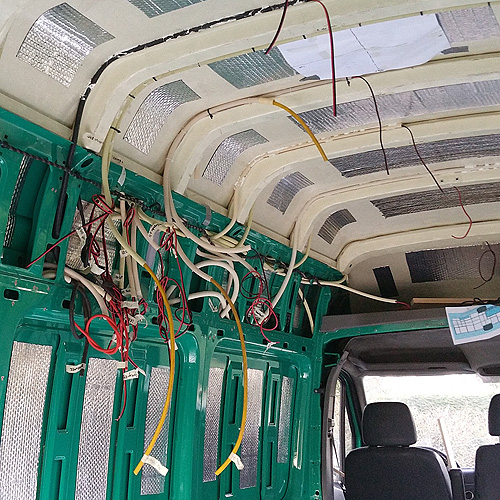
Installing wiring, rear view reversing camera, solar panels, domestic battery, fuse box, inverter, switches, LED strips, USB ports and charge controller.
Insulating the floor, walls and ceiling with glass wool and insulation boards. Covering the floors with plywood and installing wooden siding on walls & ceiling.
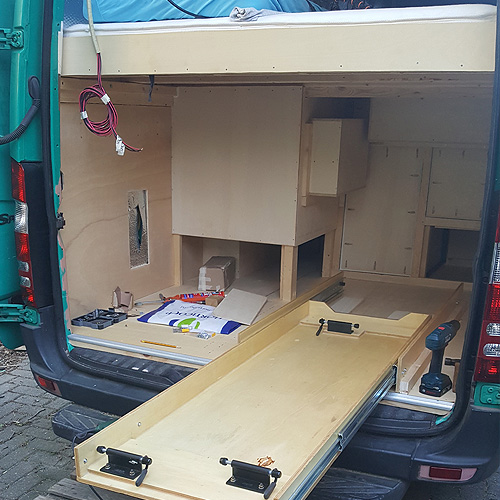
This safe and dry storage for our bikes makes mountainbiking easy.
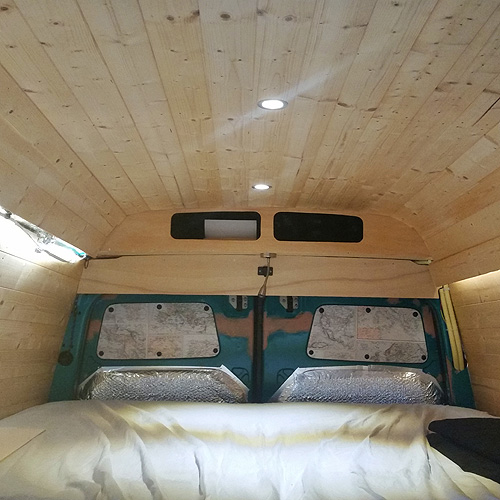
Building a double bed for ourselves and a single bed for our daughter. All for a good night sleep.
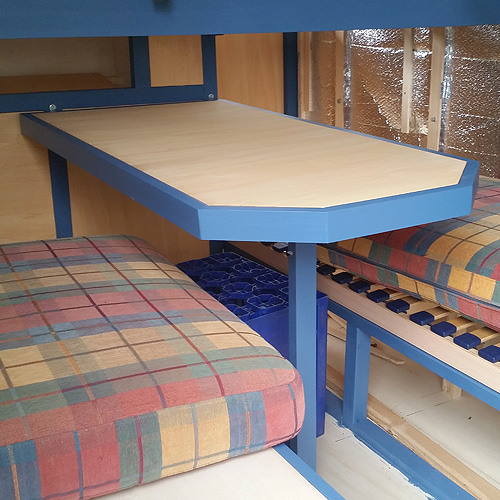
Actually we built the heaviest table in vanconversion history that is a nuisance to install, remove and store.
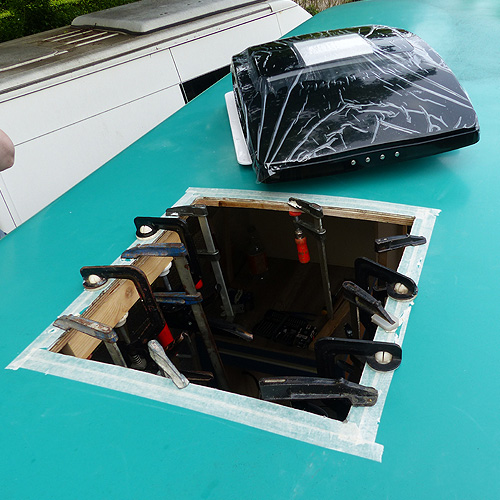
The installation of a MaxxFan Deluxe ventilation fan in our glassfiber roof. Fresh air in all weather conditions.

Two 170 Watt solar panels on our roof on both sides of the fan to charge our 250 Ah service battery.
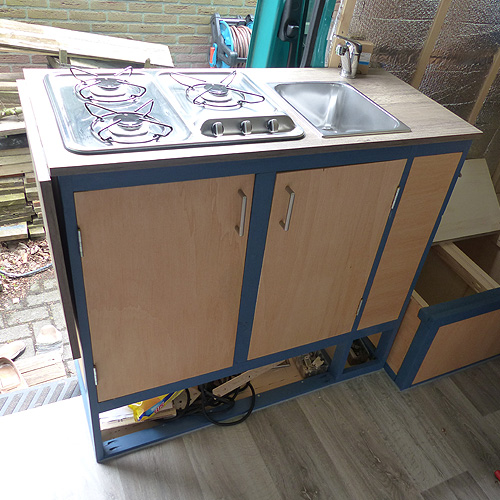
Building our kitchen with a small sink, a gasstove and an extended worktop.
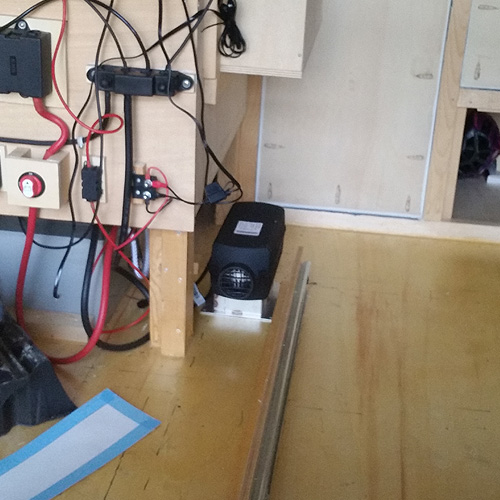
The installation of a Planar 2D Diesel Heater in our garage. Staying warm in all weather conditions.
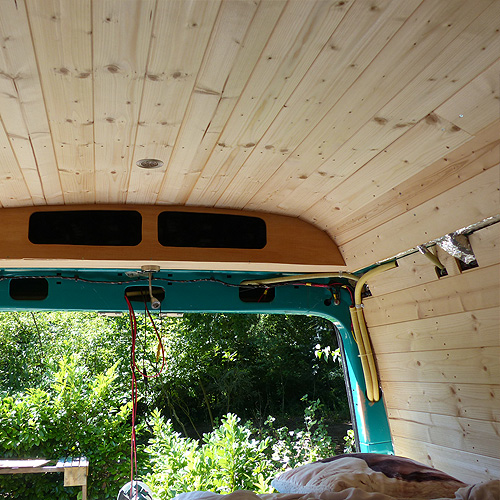
Building our walls and ceiling with light weight tongue & groove wall panelling.
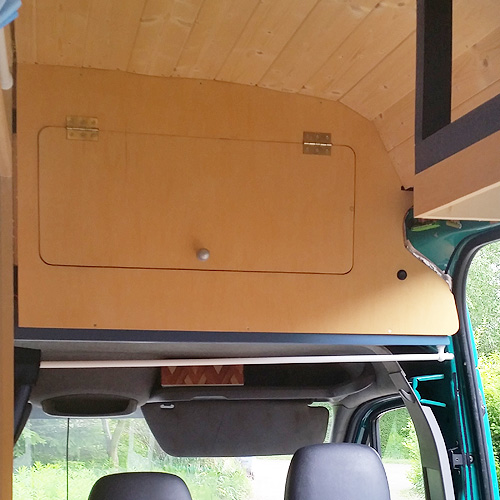
Insulating, putting fabric and installing a door in our overhead cabin storage.
Building our dividing wall, cabinet above our bed, put in a vinyl floor and hollow bench.
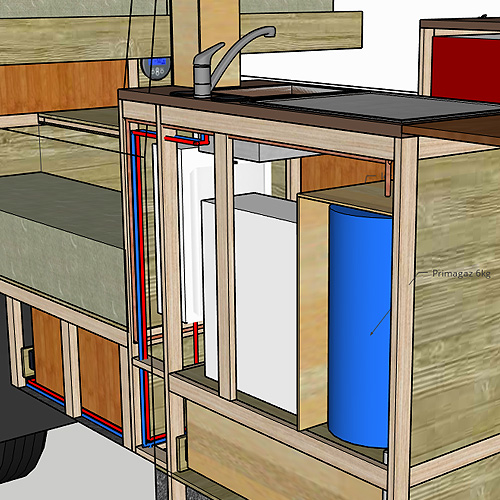

Installing our watertank, waterpump, filters and piping throughout the van.
Our simple recirculating shower and cassette toilet also doubles as a drying room.
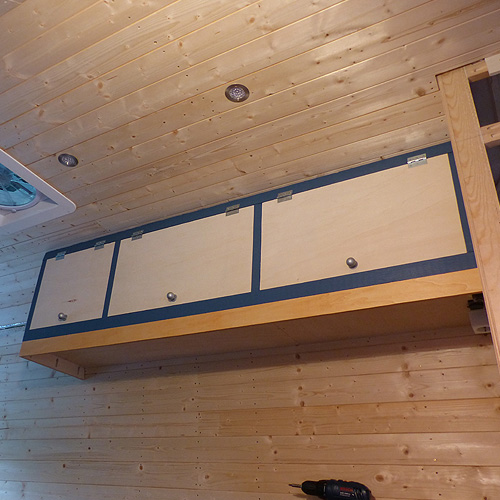
Building the overhead cabinets in our living area.
If you have a question or a comment,
please send us an e-mail.
We'd love to hear from you.