Building our walls and ceiling with light weight tongue & groove wall panelling.
Also check out ourvideo about building our cladding.
In this episode of our van conversion series we are installing our cladding on the walls and ceiling. Throughout our build we have been aware to save weight where possible. We have the largest and highest Mercedes Sprinter van we could find and we have to keep the total weight below 3.500 kilograms. So weight is constantly on our mind while we are designing and building our van. Making the walls and ceiling a light as possible, will have the potential to save lots of weight. So we've chosen the lightest way we know to build our walls and ceiling and still be strong enough.
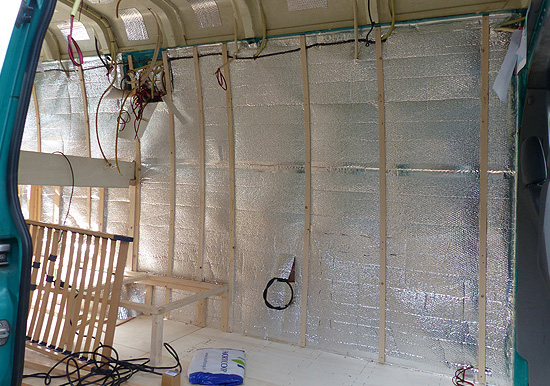
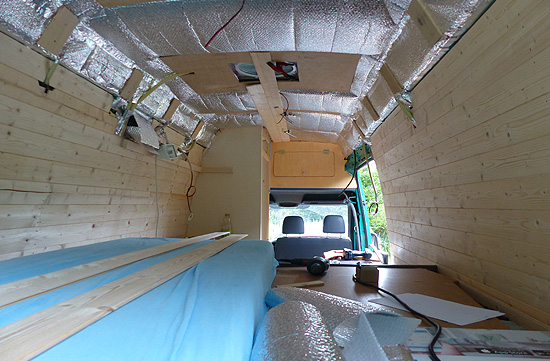
We have chosen the thinnest cladding we could find. This came in lengths of 270 centimeters, about 13,5 centimeters high and about 8 mm thick. We will be securing these on vertically placed very thin flexible wooden battens, which we attached in regular intervals to the metal struts of the sides of the van. We chose these thin wooden battens because we can bend them easily against de slightly curved walls of the van.
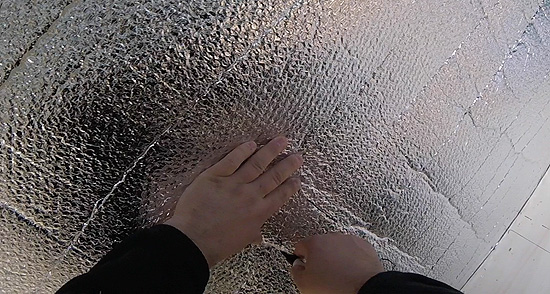
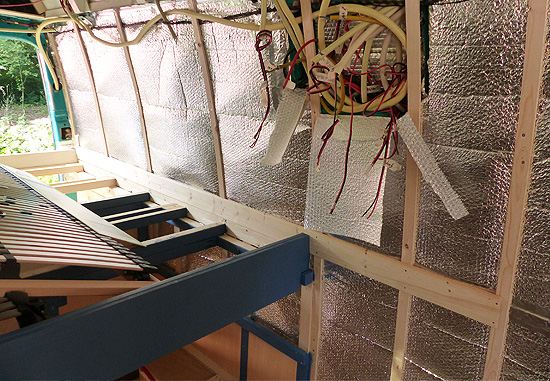
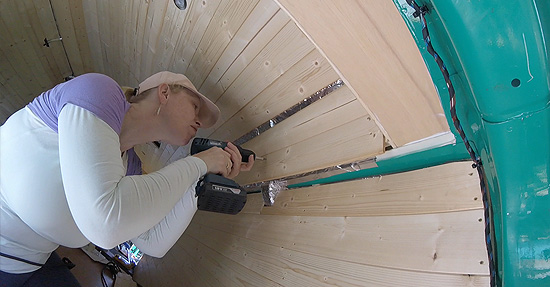
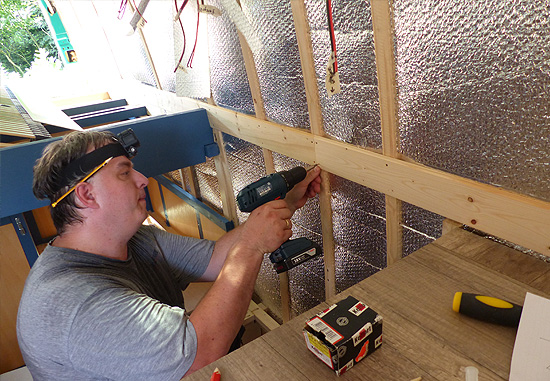
We secure the battens onto the metal parts of the walls using self-tapping screws. With a permanent marker we've drawn on the foil faced bubble wrap insulation where the metal struts are on the walls, so we know where to put the screws in. We predrilled very hole to not split the battens and to help along the self-tapping screws, which weren't as self-tapping as we hoped. We put one screw in on top and one on the bottom. Than two screws there where the batten was in line with the metal struts along the wall.
Our wooden battens are about 1 centimeter thick and about 2,5 centimeters wide. We are placing the battens about 50 cm apart. We've decided to place some more where we expect to sit with our backs against the wall, just make the walls a little bit stronger in those specific places. This might seem a little flimsy or fragile, but after assembly we are convinced the structure as a whole should be more than strong enough.
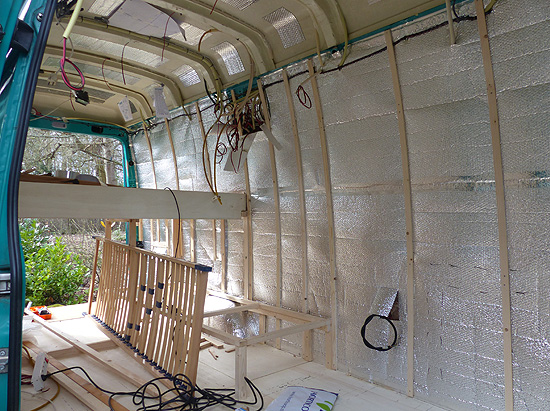
We see most people cladding their entire campervan as soon as they have finished insulating. We only cladded the areas of our van that are visible. So we don't place any cladding for example behind our kitchen units, behind our beds and benches and behind our shower slash toilet. This will save a lot of extra weight and money.
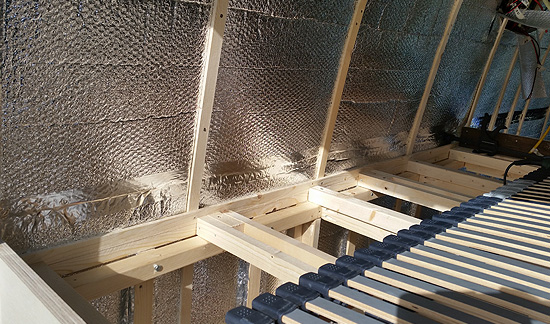
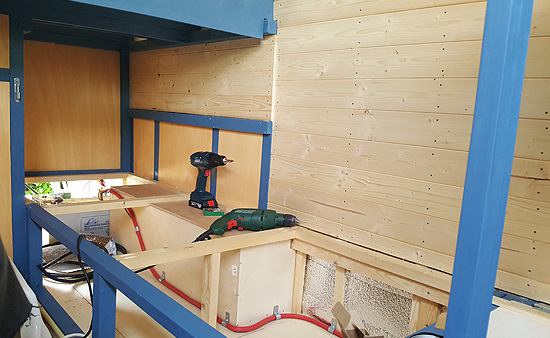
On both sides of our double bed, we used two horizontal battens to clamp the vertical batten between the metal struts of the walls and the large beams, that form the base structure of the bed.
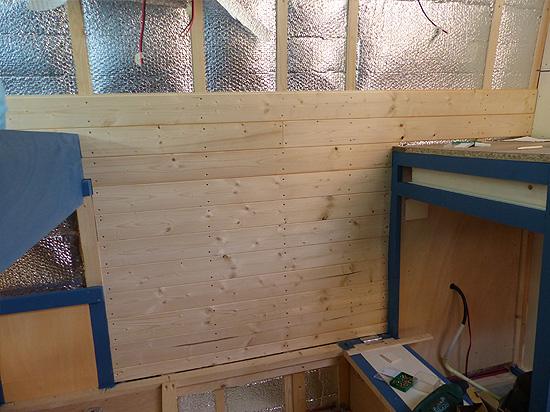
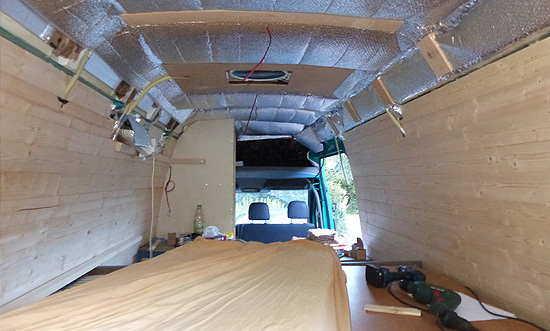
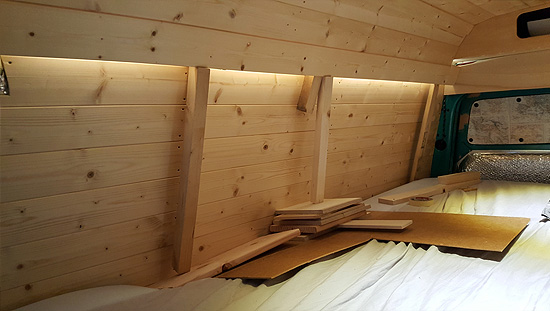
Then it's time for the cladding itself. We choose tongue and groove exposed wooden cladding as the basic look of our interior. We love the look and feel of natural wood. It is a time-consuming job, but the cladding can be installed to easily follow the curvature of the walls of the van.
We started the cladding at the base of our bed, so about the middle of the height of the walls. The bed is perfectly measured out parallel to the floor of the van. This seemed to us to be a nice optical point to have a piece of cladding over the whole length of the van resting on the bed, as a point of reference. From this first piece of cladding we worked our way up to the ceiling. And in our seating area, we worked down from this point. We knew we would have a challenge to get the bottom part in, but here we didn't mind a small gap. Because the cushions of our bench and the mattress of our daughters bed would cover this up easily.
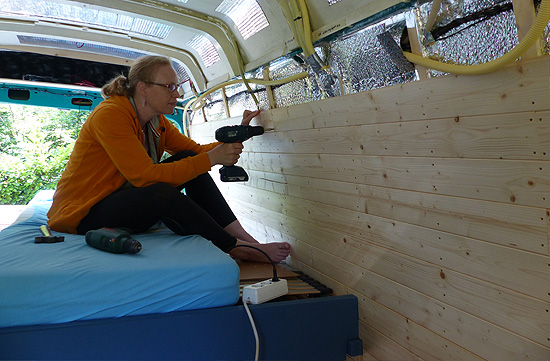
The total length of the cargo bay of our van is 470 centimeters. With the cladding being about 270 centimeters long, we can fit two pieces of cladding next to each other easily. We secure the cladding to wooden battens using small screws. We don't care much about the visible joins or screws in our cladding. But we did plan the pieces of cladding so, that our seating area had the least joins visible.

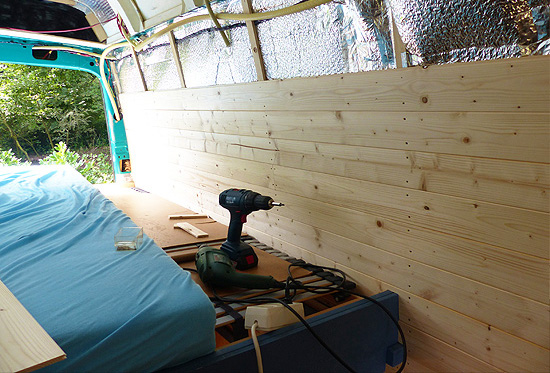
We cut the pieces of cladding to size using our Mitre saw. Mostly we cut them to be a bit longer, just to be sure it would fit and we could exactly mark the perfect fit while it was in place. Then cut it to size. But as we got more experienced, we pretty soon got the length right on the first try. The tongue and groove of the cladding was pretty tight at times, and hard to put together. So we took a piece of left over cladding, cut it in half and used it to carefully hammer the piece of cladding in place.
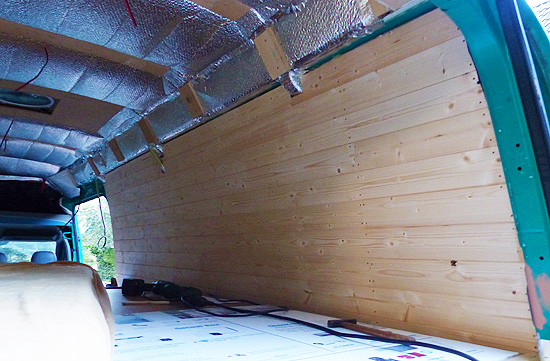
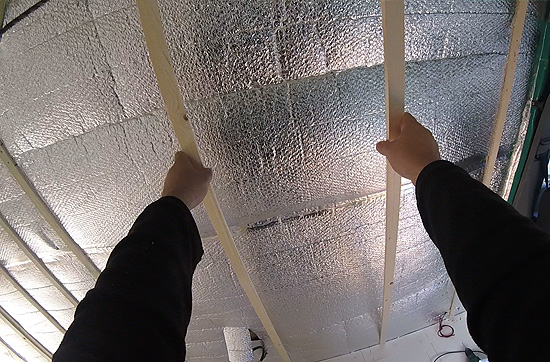
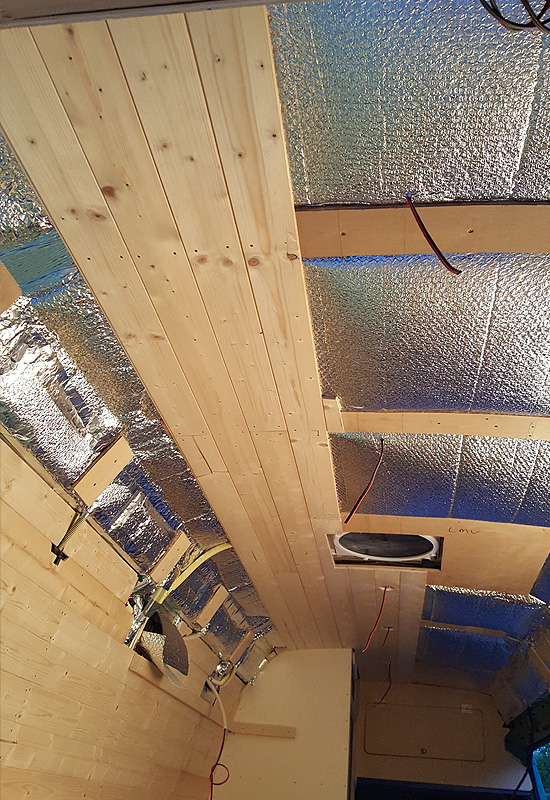
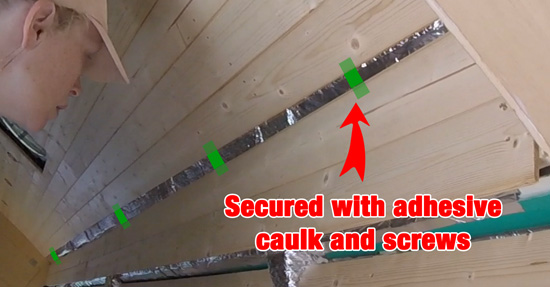
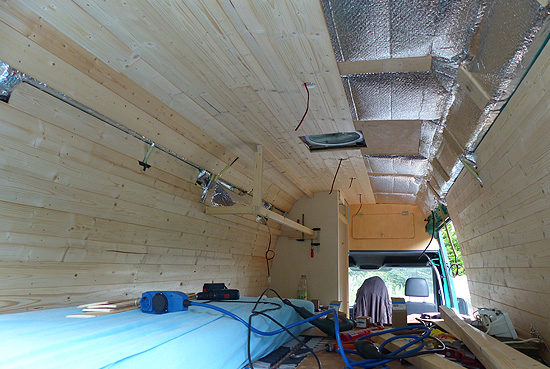
With the measuring, cutting a piece with the mitre saw, putting it in place, making the tongue and groove fitted over the whole length of the piece this is definitely a two person job. Then predrilling the holes and securing the pieces of cladding using the small screws. And there were a lot of screws. The way we cladded the ceiling was pretty much the same. We have put 9mm sheets of plywood on the ceiling to clamp the foil-faced bubble wrap to the ceiling and serve as a base to attach the cladding on. We decided to not only screw the ceiling cladding in place, but also use adhesive caulk to make sure it holds.
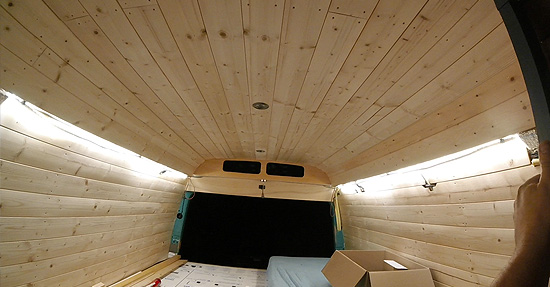
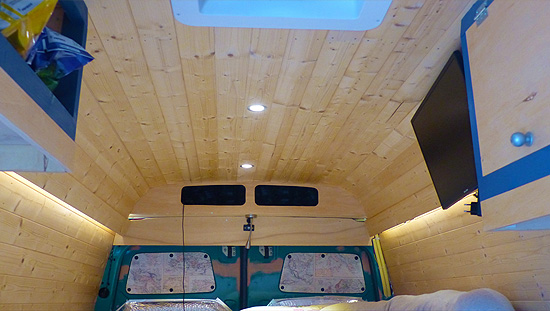
We started the cladding in the middle of the roof. We lined up the cladding to the exact middle of the roof and the roof fan we already installed. This fan we measured very accurately to be in the exact middle of the roof. We put the first pieces of cladding on temperarely with glue clamps and after we did our double checks we secured them definitively. We decided to not only screw the ceiling cladding in place, but also use adhesive caulk to make sure it holds. We didn't finish the ceiling in one go. We put half of the ceiling in and left it like that until our electrical system was finished, so we could easily access the ceiling spots.
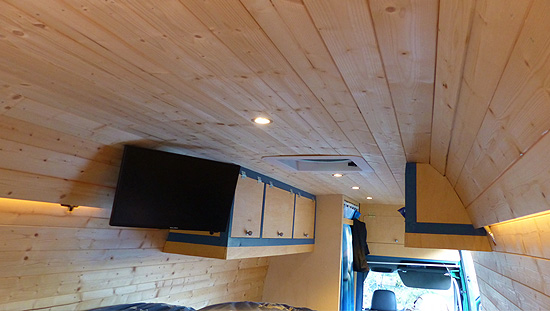
And then a small disaster strikes. After a lot of work and having finished two thirds of the ceiling we discovered we made some mistakes and had put the cladding on slightly skewed. The pieces of cladding were about 2 to 3 cm out of line and weren't all parallel to the sides of the ceiling. This really bummed us out, to say the least. Our initial thought was to completely redo the ceiling. We decided to leave it be. Our overhead cabinets would cover a large part of the mistake anyway.
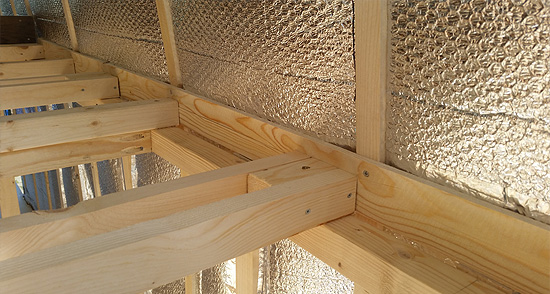
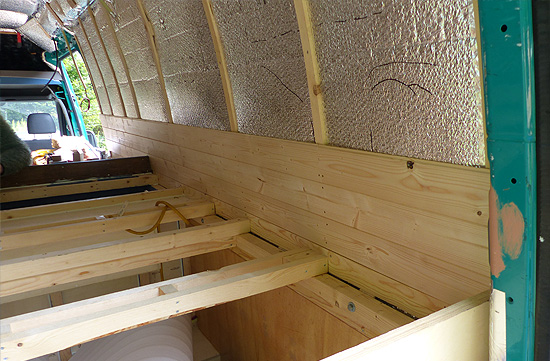
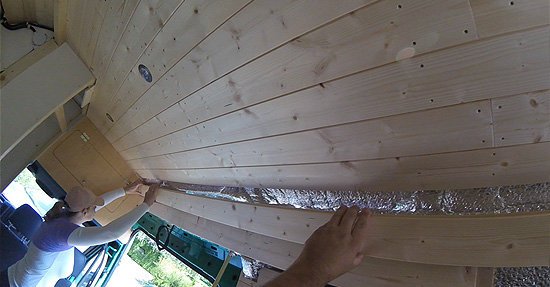
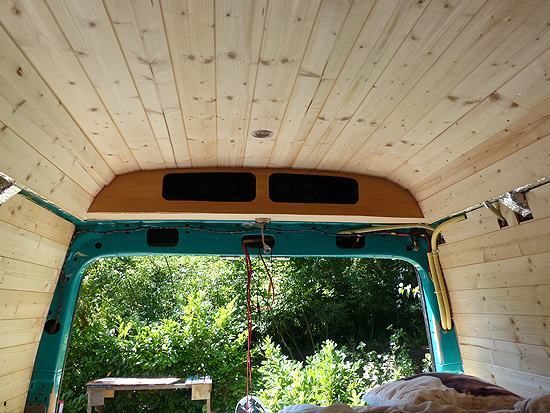
The transition from ceiling to the walls was a challenge. We installed the cladding on the walls as high as we could. We put two pieces of cladding on the side of the glass fiber roof, which left us with two gaps to get creative with. First the gap between the side and flat bit of the roof. Here we put in left over pieces of the wooden battens, clamped them behind both ends of existing cladding and secured a third custom made piece of cladding too the battens. So this gave our ceiling a nice finished look.

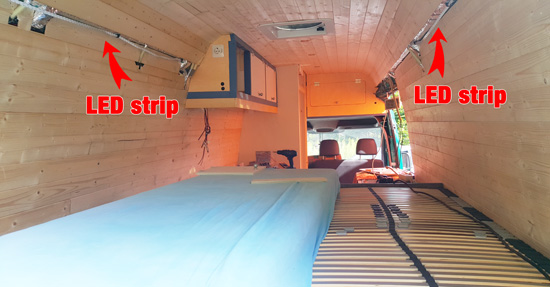
The gap between the roof and the walls we left until we installed dimmable led strips on both sides of our bed. Next we have extended the cladding on the side with on extra piece to hide the gap between the walls and the ceiling. Also making the led strip into a nice indirect light source.

We haven't yet treated the wood, because we like the natural smell of wood so much. We might use Danish oil to treat the cladding later on. But we are still not sure about that.
So this concludes this quick look at how we installed our cladding in our living area. I hope we've given you some insights in how we managed. And hopefully left you with some ideas on how to apply our experience in your own van conversion.
Also check out ourvideo about building our cladding.