Insulating, putting fabric and installing a door in our overhead cabin storage.
Also check out our video about building the overhead cabin storage.
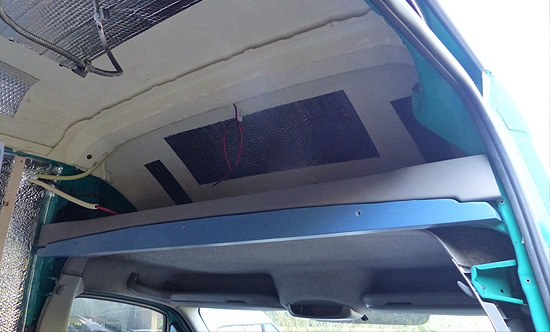
Our L4H3 mercedes benz Sprinter came with a large space above the cabin, including a factory made shelf of molded hard plastic with a grey auto carpet finish. This gave us a lot of extra storage to hold lots of stuff without taking up space in the rest of our van. But it doesn't have a bulkhead between the living area and the storage above the cab area. We decided to build one with a small door, in the same style as the rest of our interior.
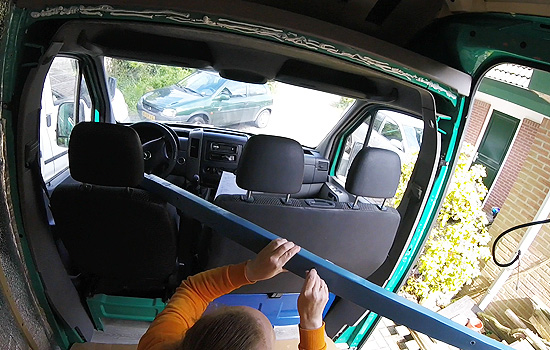
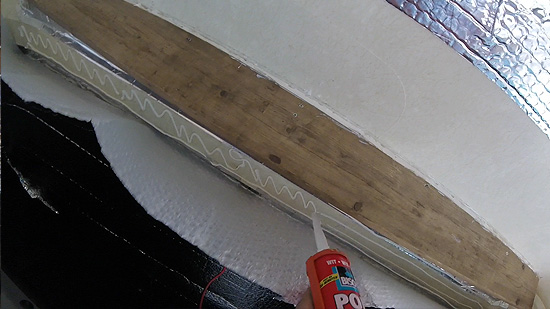
The factory made plastic shelf was strong enough and on the side was supported by a metal strut along the width of the van. A strong support, but to awkward to secure the bulkhead to. We decided to put in an extra wooden beam over the whole width of the van, that we custom made to fit exactly. We painted the beam in the blue color we'll use in all our interior. On this beam we can in turn secure our plywood bulkhead.
We have secured the beam using the existing holes on the metal strut. A trick we used was putting a screw in each of the holes we want to use. Then putting paint on the screw head. Put the batten in place and push the batten into the paint on the screw. It leaves a mark where you have to drill a hole.
We drilled a small pilot hole through the whole beam. And then we widened the holes on the visible side of the beam with a larger drill, so the screw would be well inside the beam and we can fill in the holes and paint over it.
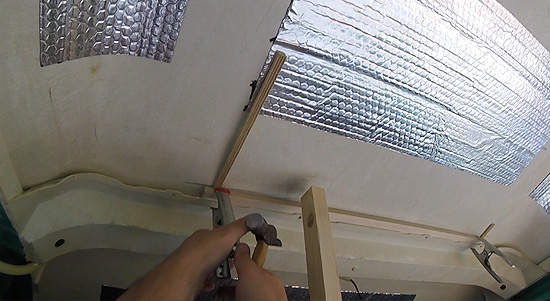
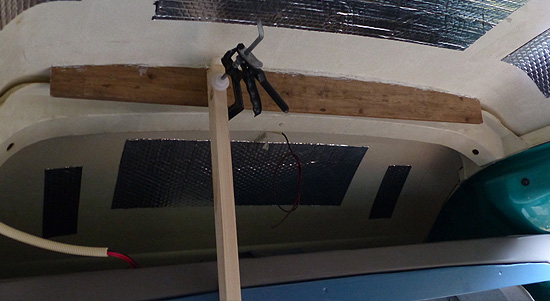
We cut a cardboard template of the front panel. First a rough one and then fine tuning it to the contours of the space. We would eventually transfer this template to 9 mm plywood and cut the frontpanel to size with a jigsaw. But we had to also put a batten against the ceiling to secure the bulkhead to. So before cutting the frontpanel we put this batten in.
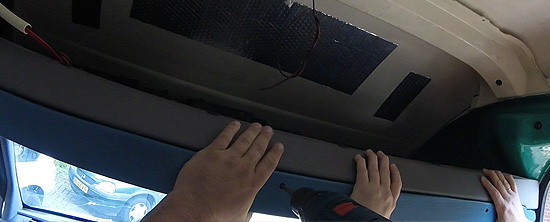
There are ribs on the ceiling that have niches that can precisely fit a 12mm piece of plywood in. So we cut a piece of left over plywood to size and glued it in place just under the ceiling. This gave us just enough of a base to secure a large batten to, using adhesive caulk and screws.
Cutting the plywood bulkhead from the template took some time and fine tuning, but eventually we got there with a perfectly fitting piece. The most stressful part of this project was to cut into this perfectly fitted bulkhead, to cut out the door in one piece with the jigsaw.
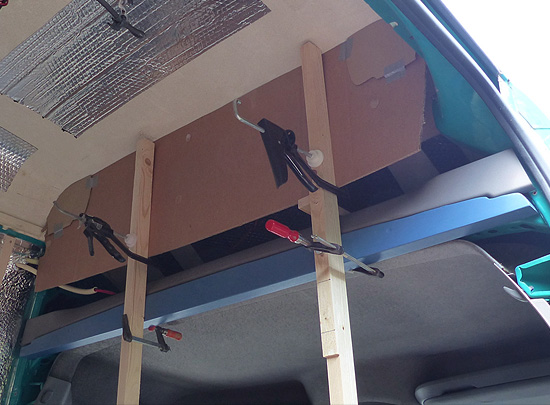
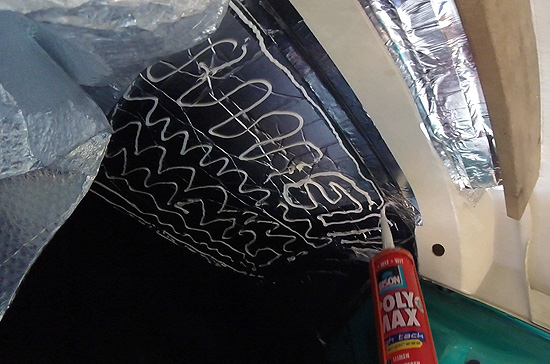
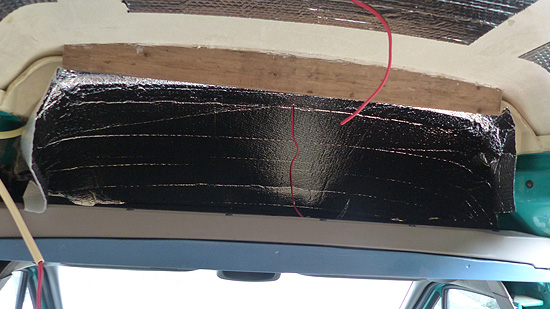
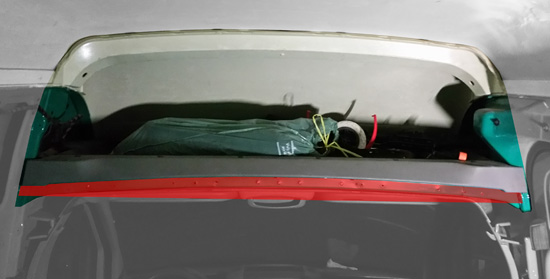
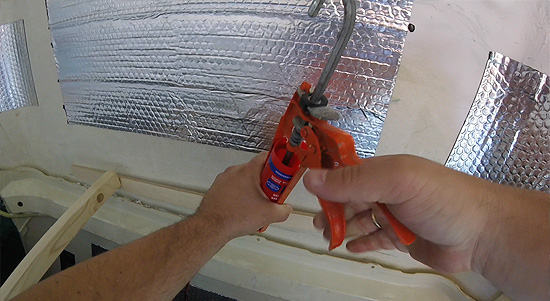
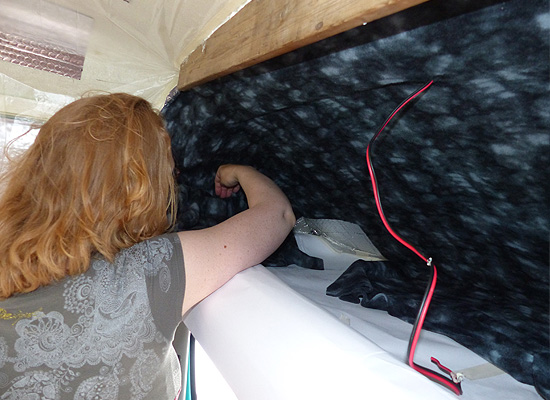
Before getting the panel in place, we insulated the inside of the roof heavily, because it used to get extremely hot right under the fiberglass roof. We put one big piece of reflective foamboard in the middle. We secured it to the fiberglass roof using adhesive caulk. We used left over wood to make a lot of stamps to keep the foamboard tightly to the roof surface, while the caulk cures.

We actually have multiple boxes with left over battens and beams, plywood and foamboard we use for these kind of project. We never throw any leftover wood away until the project is finished.

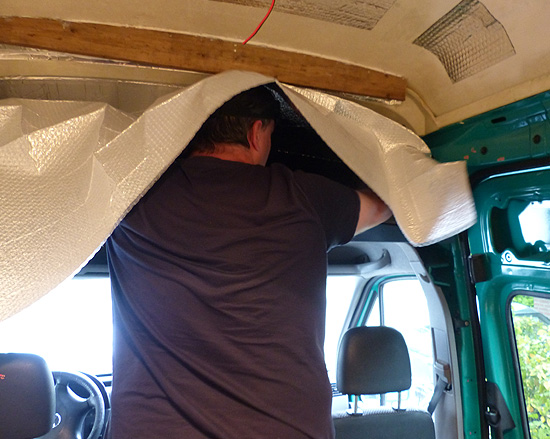
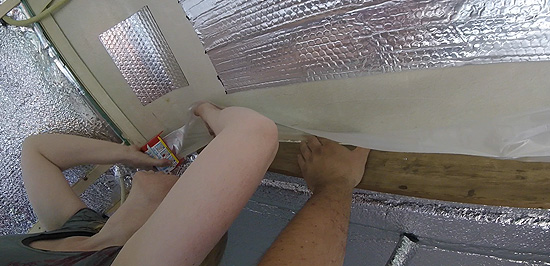
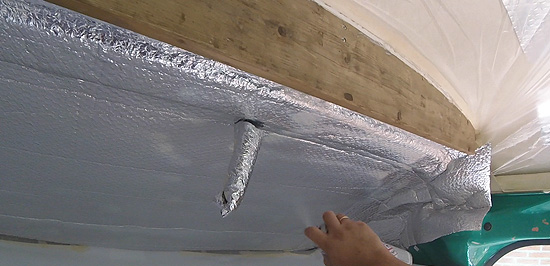
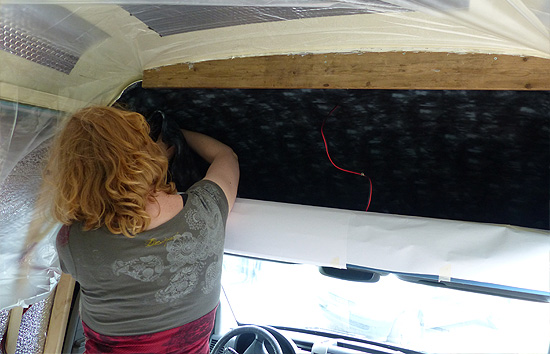
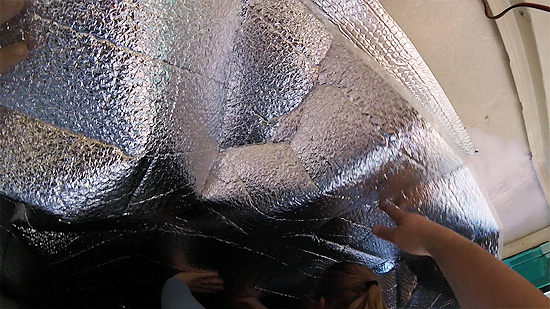
The remaining holes we filled with left over pieces of foamboard. And the seams we filled with rockwool. Then we cover all the seams with reflective aluminium tape. To smooth out the surface we put in reflective foil faced bubble wrap. This is a nice even surface to apply fabric to. Again we use adhesive caulk to secure the reflective foil to the insulating foamboard. Especially getting the foil cut to fit all the rounded corners of this space, takes up a lot of time. And you want to do this properly, because it's the basis for the final layer of fabric and we want it to look kinda nice.
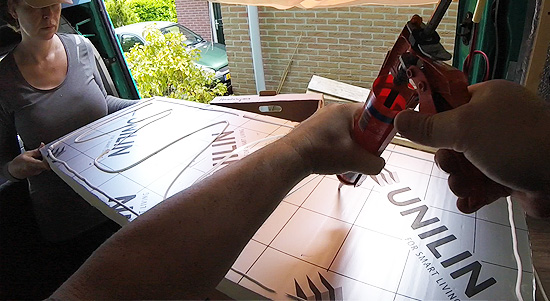
After a long battle with the reflective foil it's time to put in the final layer of fabric. We are not using standard auto carpet to line the bulkhead with, but an old thin fleece blanket we had laying around. We are going to use Bison Spray Adhesive to secure this to the reflective bubble wrap.
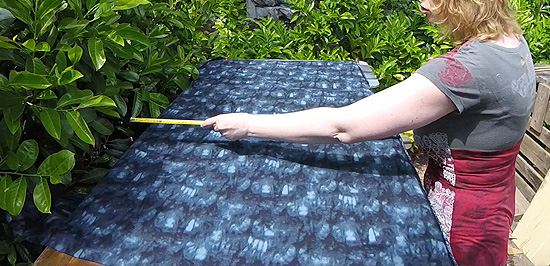
To prevent the spray adhesive to go everywhere, we put in protective plastic foil along the ceiling and we covered the bottom of the cabin storage with paper which we taped on the sides. We cut the fleece blanket roughly to size with at least 10 cm of extra fabric on all sides.
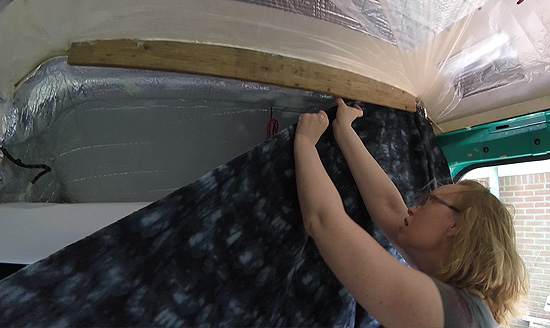
We applied the Bison spray adhesive to both surfaces, so my wife sprayed the blanket and I did the cabin storage. After a few minutes of letting the spray adhesive cure, we pushed the fleece blanket against the inside of the storage cabinet. Getting the fleece fitting in all the nooks and crannies takes most of the time. Step by step we cut the fleece to size and glue it in place.
We actually decided to build the side wall of our shower slash toilet first. And then put in the bulkhead slash front panel. So actually building the overhead cabin storage was a project drawn out over a few months, as we finished the electrical system and loads of other projects.

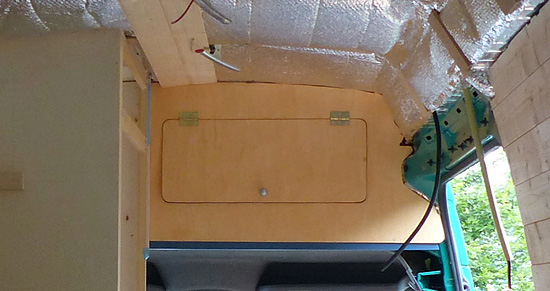
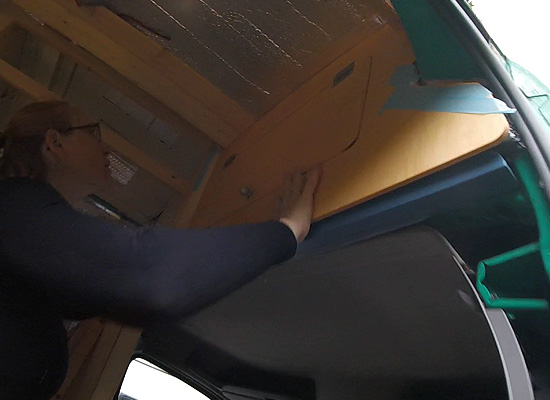
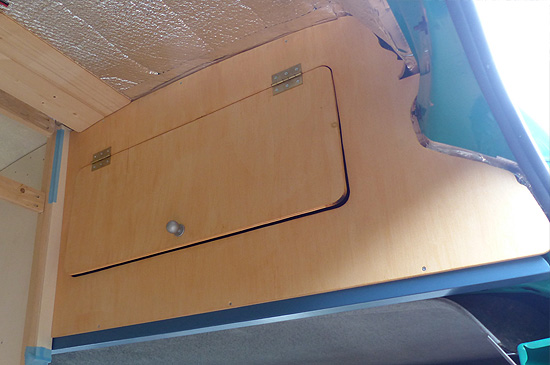
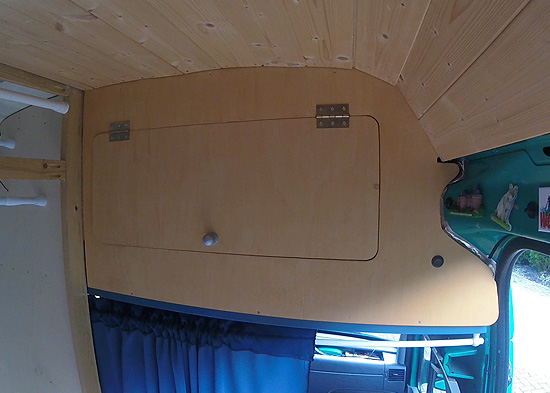
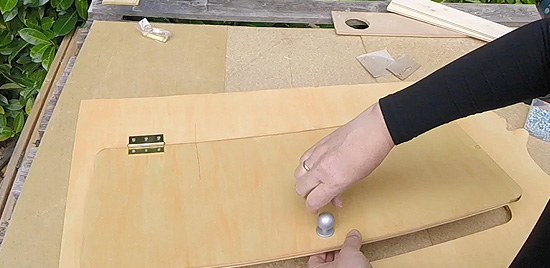
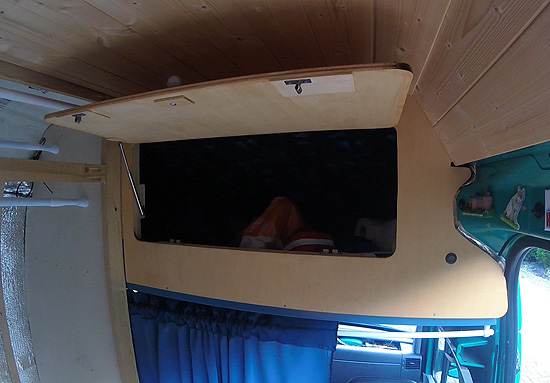
Just before we put our ceiling in, we put the bulkhead in. We treated the plywood frontpanel with regular light wood-stain, so you can still see the wood grain to retain the natural feel of the wood.

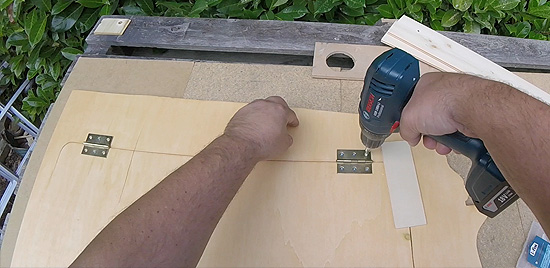
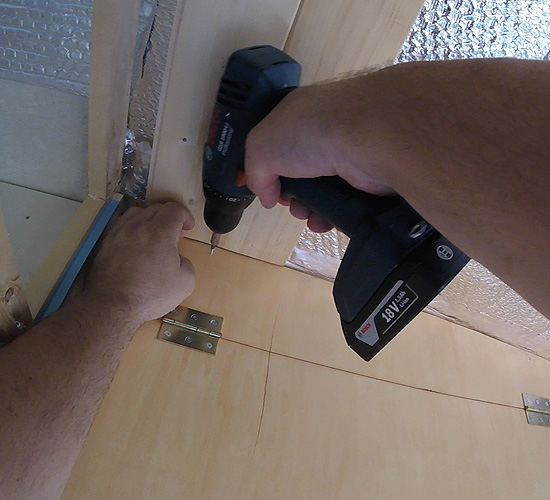
We used simple basic hinges to make the door functional. And a simple small door knob. Nothing fancy as long as it works.
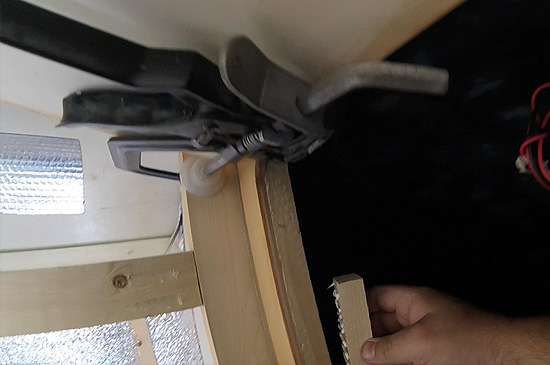
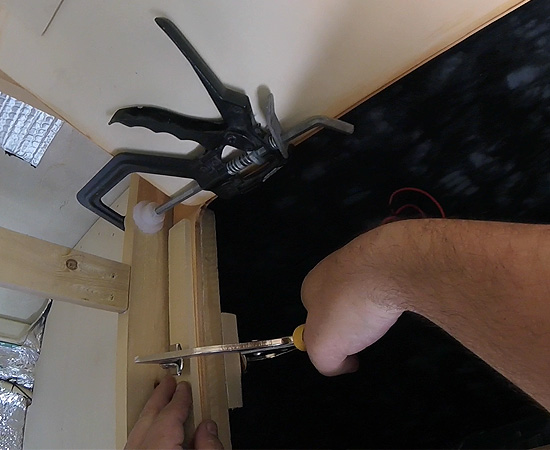
Lastly we put in a pneumatic spring we reused from an old vanity cabinet, so the door stays open in the upright position.
On the left side of the door we had to attach two small battens to strengthen the bulkhead and create the space to secure the pneumatic spring to. It was quite a tight space to work in. We decided to glue the wood and not to use screws.

After some tinkering to get the pneumatic spring to work properly, the door worked like a charm.
So this is not a world shocking part of the build, but it shows in detail how we've built our overhead cabin storage, hopefully giving you some idea's and tips for your own van conversion.
Also check out our video about building the overhead cabin storage.