Remove side panels and bulkhead, rust removal, side trim sealing, placing a double seat, sound deadening and installing a window in the sliding door.
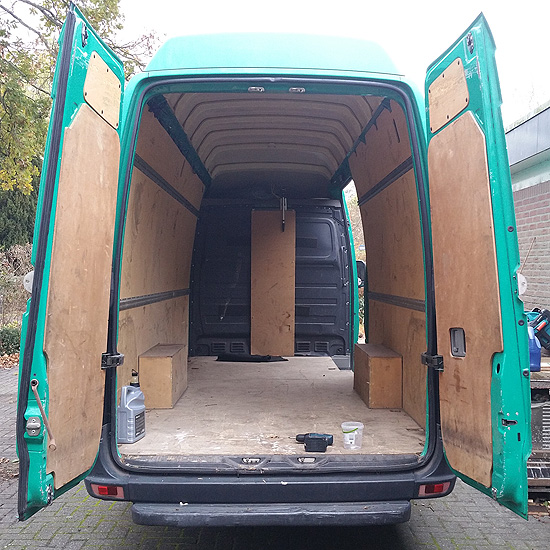
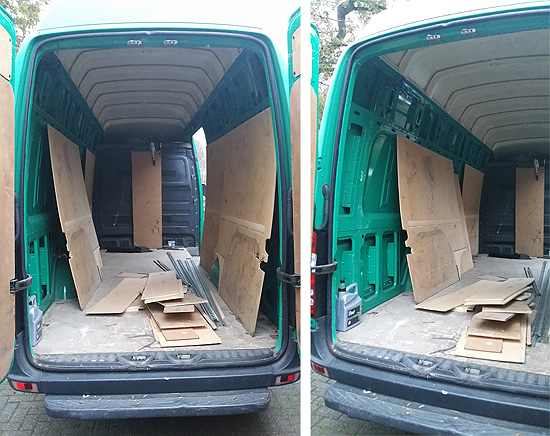
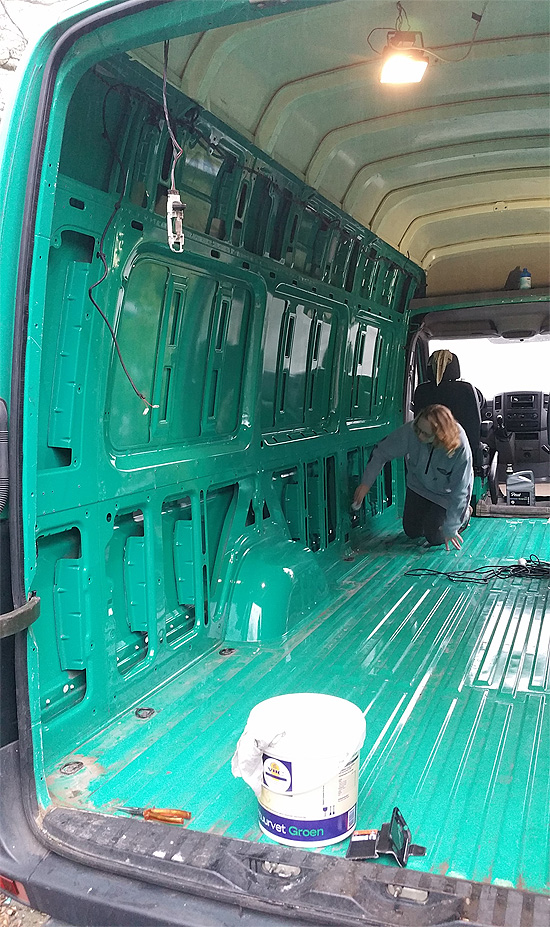
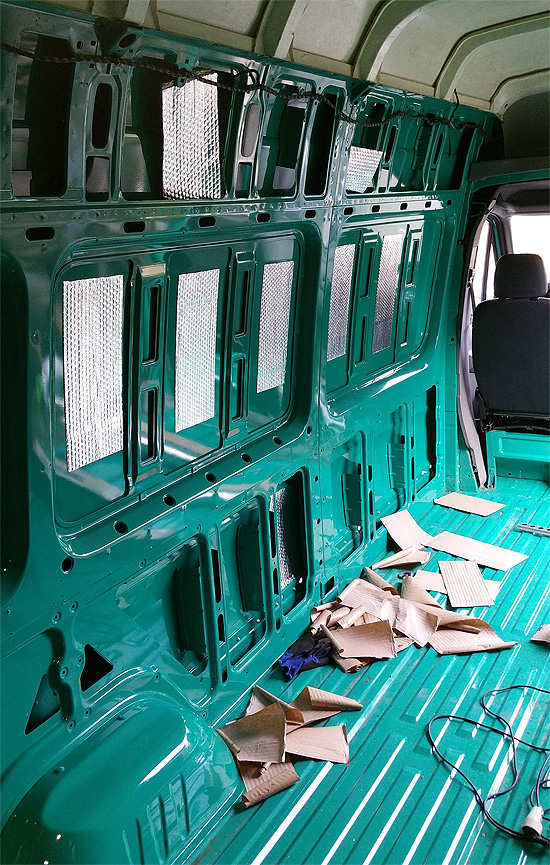
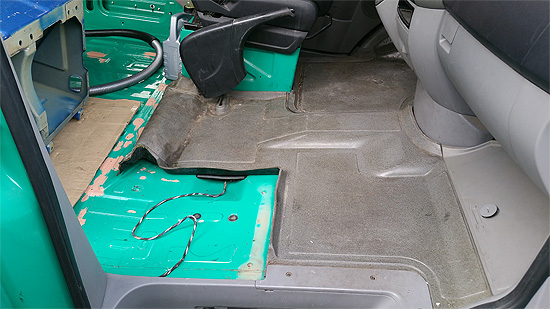
Our first step was removing the plywood side panels from the walls and the floor. Also we removed the bulkhead between cargobay and cabin. The panels were mostly in pretty good shape, so we kept the plywood just in case. Turned out to be the good decision, since we've re-used it on several occasions.
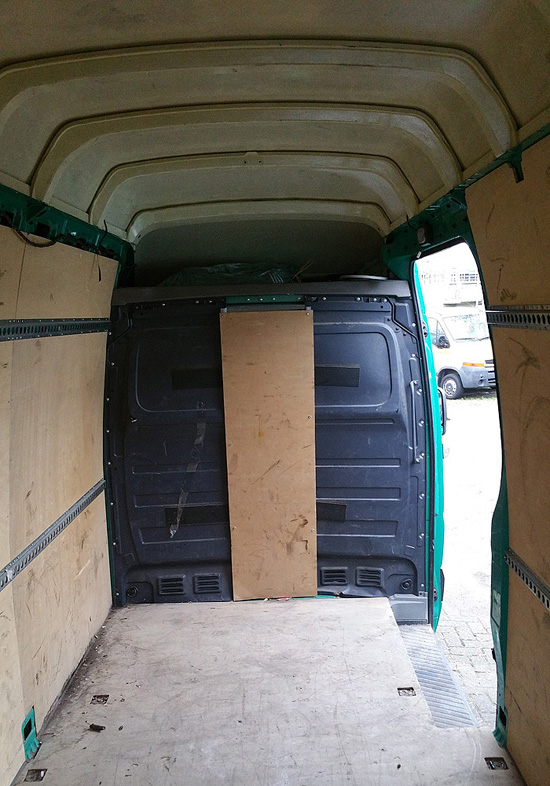
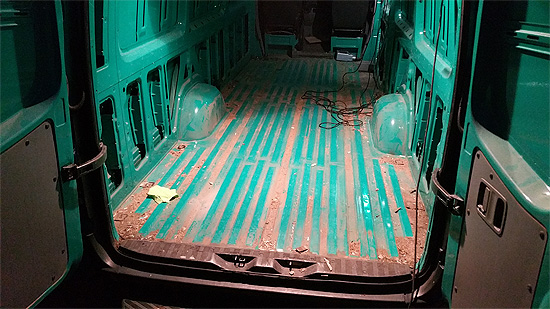
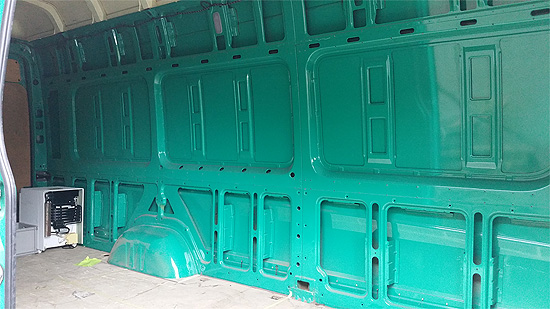
The walls and floor turned out to be in prety good shape. A lot of dust and dirt under the floor, but nothing to bad. Also a few rusty spots, but nothing to worrying.
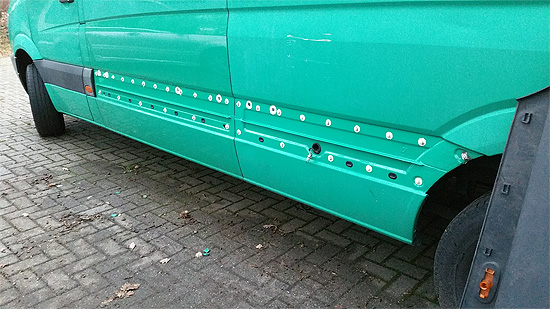
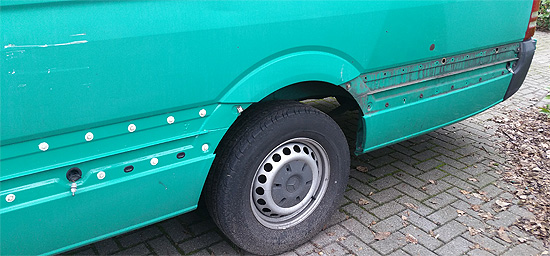
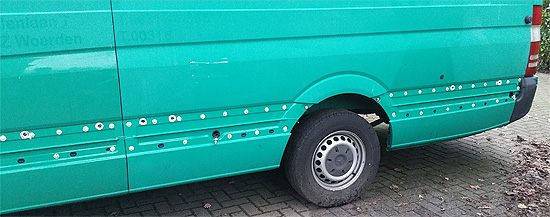
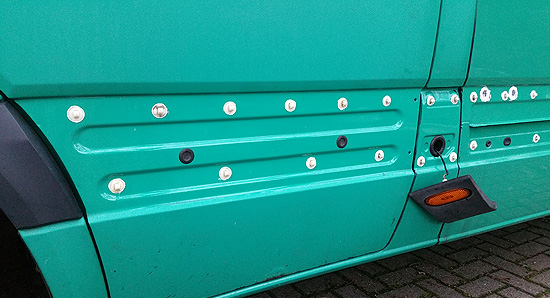
What was worrying however was wet spots along the intersection of walls and floor. Leakages in several places that were not obvious at first. After some research it turns out Mercedes Sprinter vans are notorious for leaking side trim panels. Thanks to this great video of Black Rock Outfitters we found the cause of the leaks.
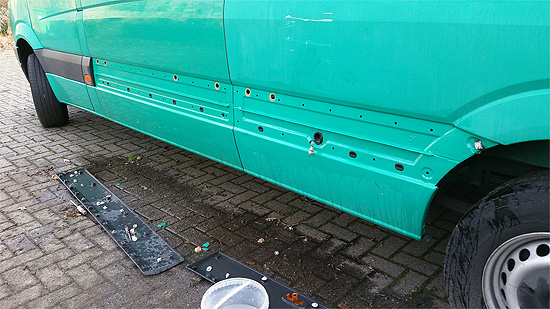
So we took all of the side trim panels of. We took all of the plastic clips of. Thoroughly cleaned everything. We even washed the plastic clips with a toothbrush! Eventually we used white silicone sealant to glue the clips back into place, hopefully never to leak again.
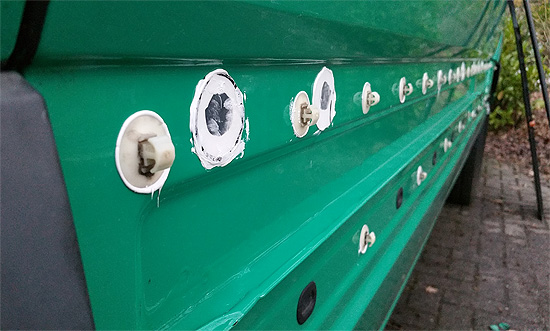
What also baffled us, were the holes (diameter about 15 mm) in the metal sides, that should be covered with a sticker. In our case they were mostly missing or basically just fell off, as the adhesive didn't work anymore. We sealed these holes with plastic patches, we cut from the lids of plastic boxes our local chinese takeaway uses. We used transparent plastic so we could see and make sure the sealant got distrubuted fully to make it watertight.
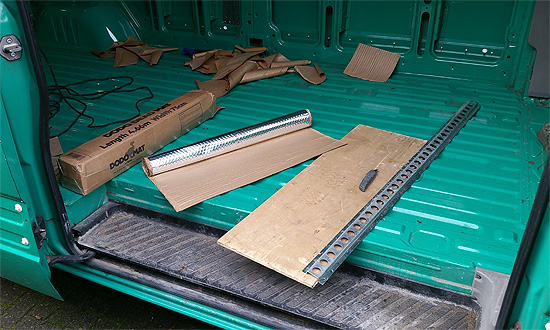
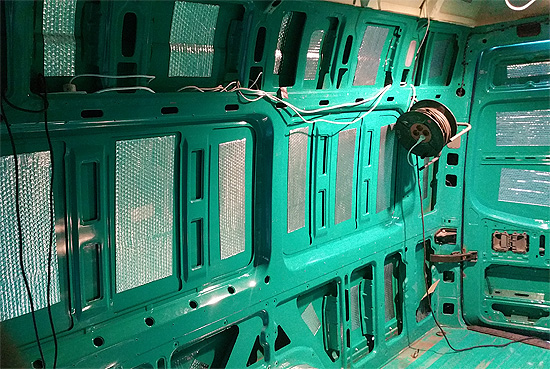
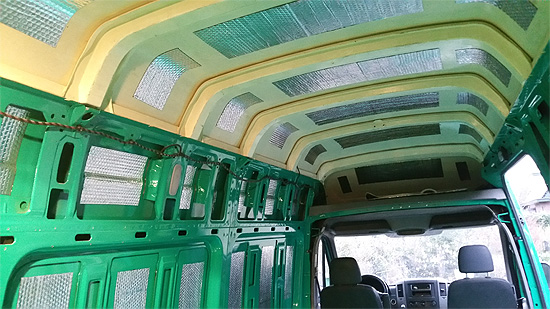
Next is the sound deadening of the walls, roof and wheel wells. We cleaned all surfaces with isopropyl alcohol 70% mixed in water. We used the Dodo Mat Hex Roll as it was the cheapest available option for us. Also it has a relatively low weight. It is self adhesive, so you can simply cut, peel & stick it to the walls. It worked fine. Only about 70% of the surface had to be covered to achieve a soundproofing effect. So we pre-cut most of the pieces on some left-over plywood with a metal beam and a Stanley knife.
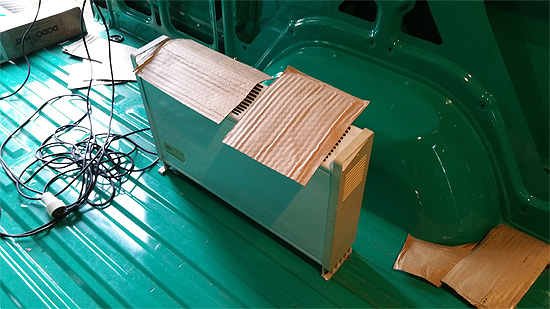
We were working outside in december, so it was pretty cold. The Dodo Mat has a butyl compound, so it gets quite stiff in low temperatures. So we used an electric heater to heat not only ourselves and the van, but also to pre-heat the Dodo Mats just before peeling and applying it to the wall.
To make sure all airbubbles are out, we rolled it firmly with a paint roller. This is also the safe way to do this. Doing it by hand can result in nasty cuts, as the sides of the foil can be really sharp, as we have experienced.
A great video on sound deadening is "Noise & Vibration in you camper van" by Greg Virgoe. We've learned a lot from the video series Greg has publisd on YouTube and we can higly recommend them to anyone who wants to convert their own van. We will be referencing Greg regularly on these pages. Also the videos of "EXPLORIST life - DIY Campers" are great to watch. The have a video on Sound Deadening as well.
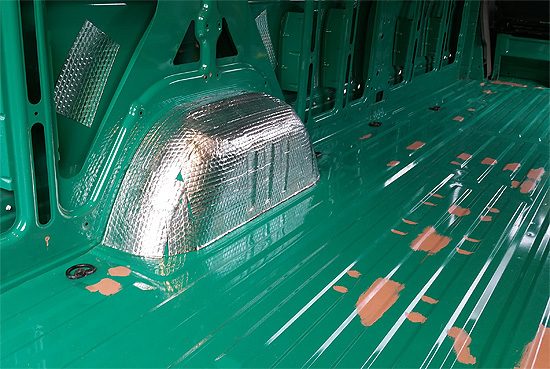
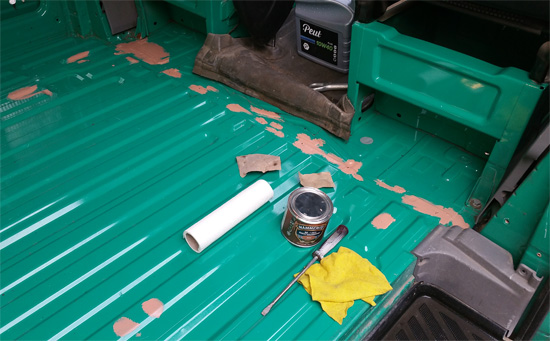
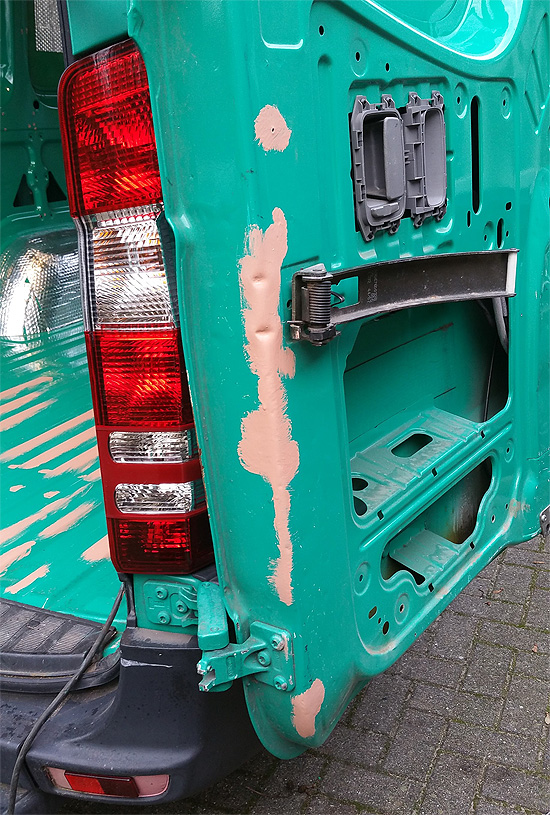
Both wheel wells we completely covered in de sound deadening Dodo Mat, as it's a source of a lot of vibration and sound. Also we started the anti-rust treatment. We cleaned the floor, sanded the rust away to bare metal and cleaned again with isopropyl alcohol 70% mixed in water to make the surface oil free. The reddish patches are Hammerite red oxide primer applied to the formally rusty spots.

All places that will be hidden behind walls and floors, we treated with a thick layer of the Hammerite primer. Better safe than sorry. We also treated all the screw holes, left by the plywood panels. All in all the cargobay was in pretty good shape, rust-wise.

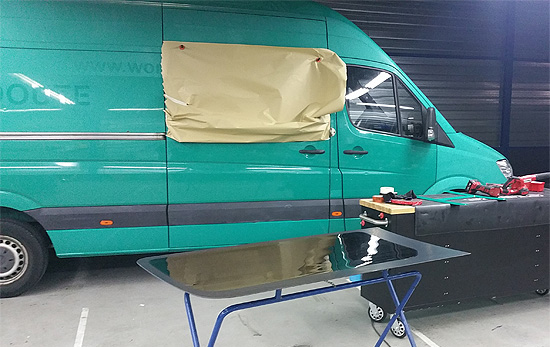
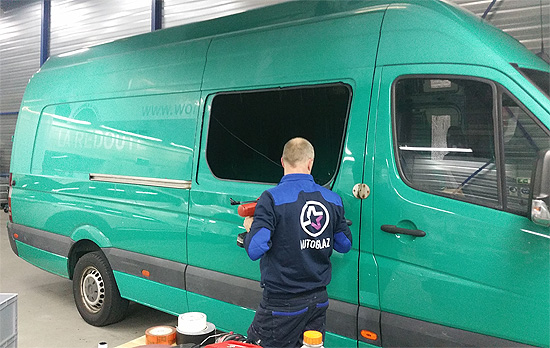
Then installing a window in the sliding door of our campervan. We decided we were not yet ready to cut a huge hole in our van ourselves. We bought a factory Mercedes Sprinter privacy tinted window and the service station could install it for a relatively modest price. It turned out to be a 12 minute job for a true professional with the right tools. It was actually a joy to watch.

The hole was cut using a formittable looking cutting tool, that turned out to be so called a Nibbler. A lot faster then our jigsaw at home. The edges were finished with an anti-rust primer and a rubber edge trim was put along the edges. On the glass of the inside of the window a primer for the adhesive was applied. Then a thick layer of adhesive was applied to the van. And the window was pushed on the adhesive and temporarily held in place by some tape. You can watch this video to get a feel of how the proces goes.
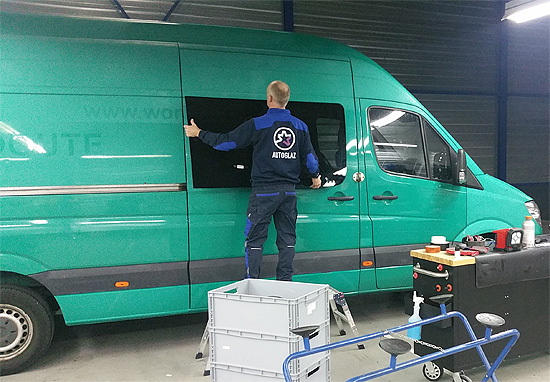
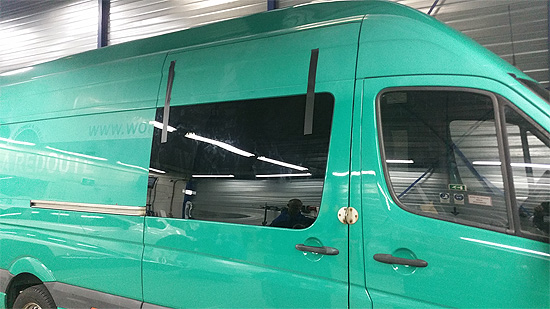
After about a 30 minutes wait, the adhesives have gone off enough to be able to drive. I was in and out in about 45 minutes. In hindsight it was a job we could have done ourselves, however with the tools we had available it would have taken us many hours. A great job done by Autoglaz Haarlemmermeer in Hoofddorp.
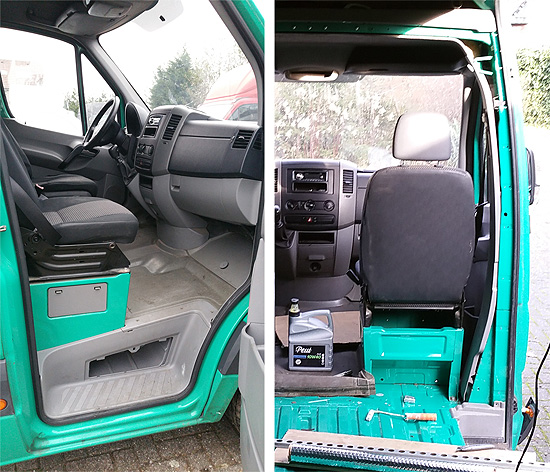
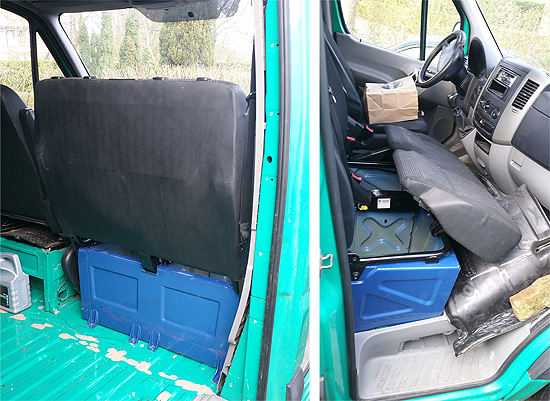
The last of our prep projects is replacing the single seat with a double. We found and bought one via a used items website. We took the single seat out by removing the bolts. We cut the floor matt to size, so the double seat would fit. Luckily the chassis was prepared with factory made screwholes. We bought the official Mercedes Benz bolts at a local dealer, because of the load strength requirements. The double seat fit perfectly and we only had to tighten the bolts. There is even some storage space under the seats. The only hint the seats are not original to the van, are the colours. Ah well, blue is nice as well.
Also check out our video Strip 'n' Prep.